Admin
As an admin, you set up ISPICIO_E: log in for the first time, activate the license, define the password rules, connect the email server and the SAP systems, and create users.
On this page
Log in for the first time
-
Open the address of ISPICIO_E in your browser:
localhost:8080/e2022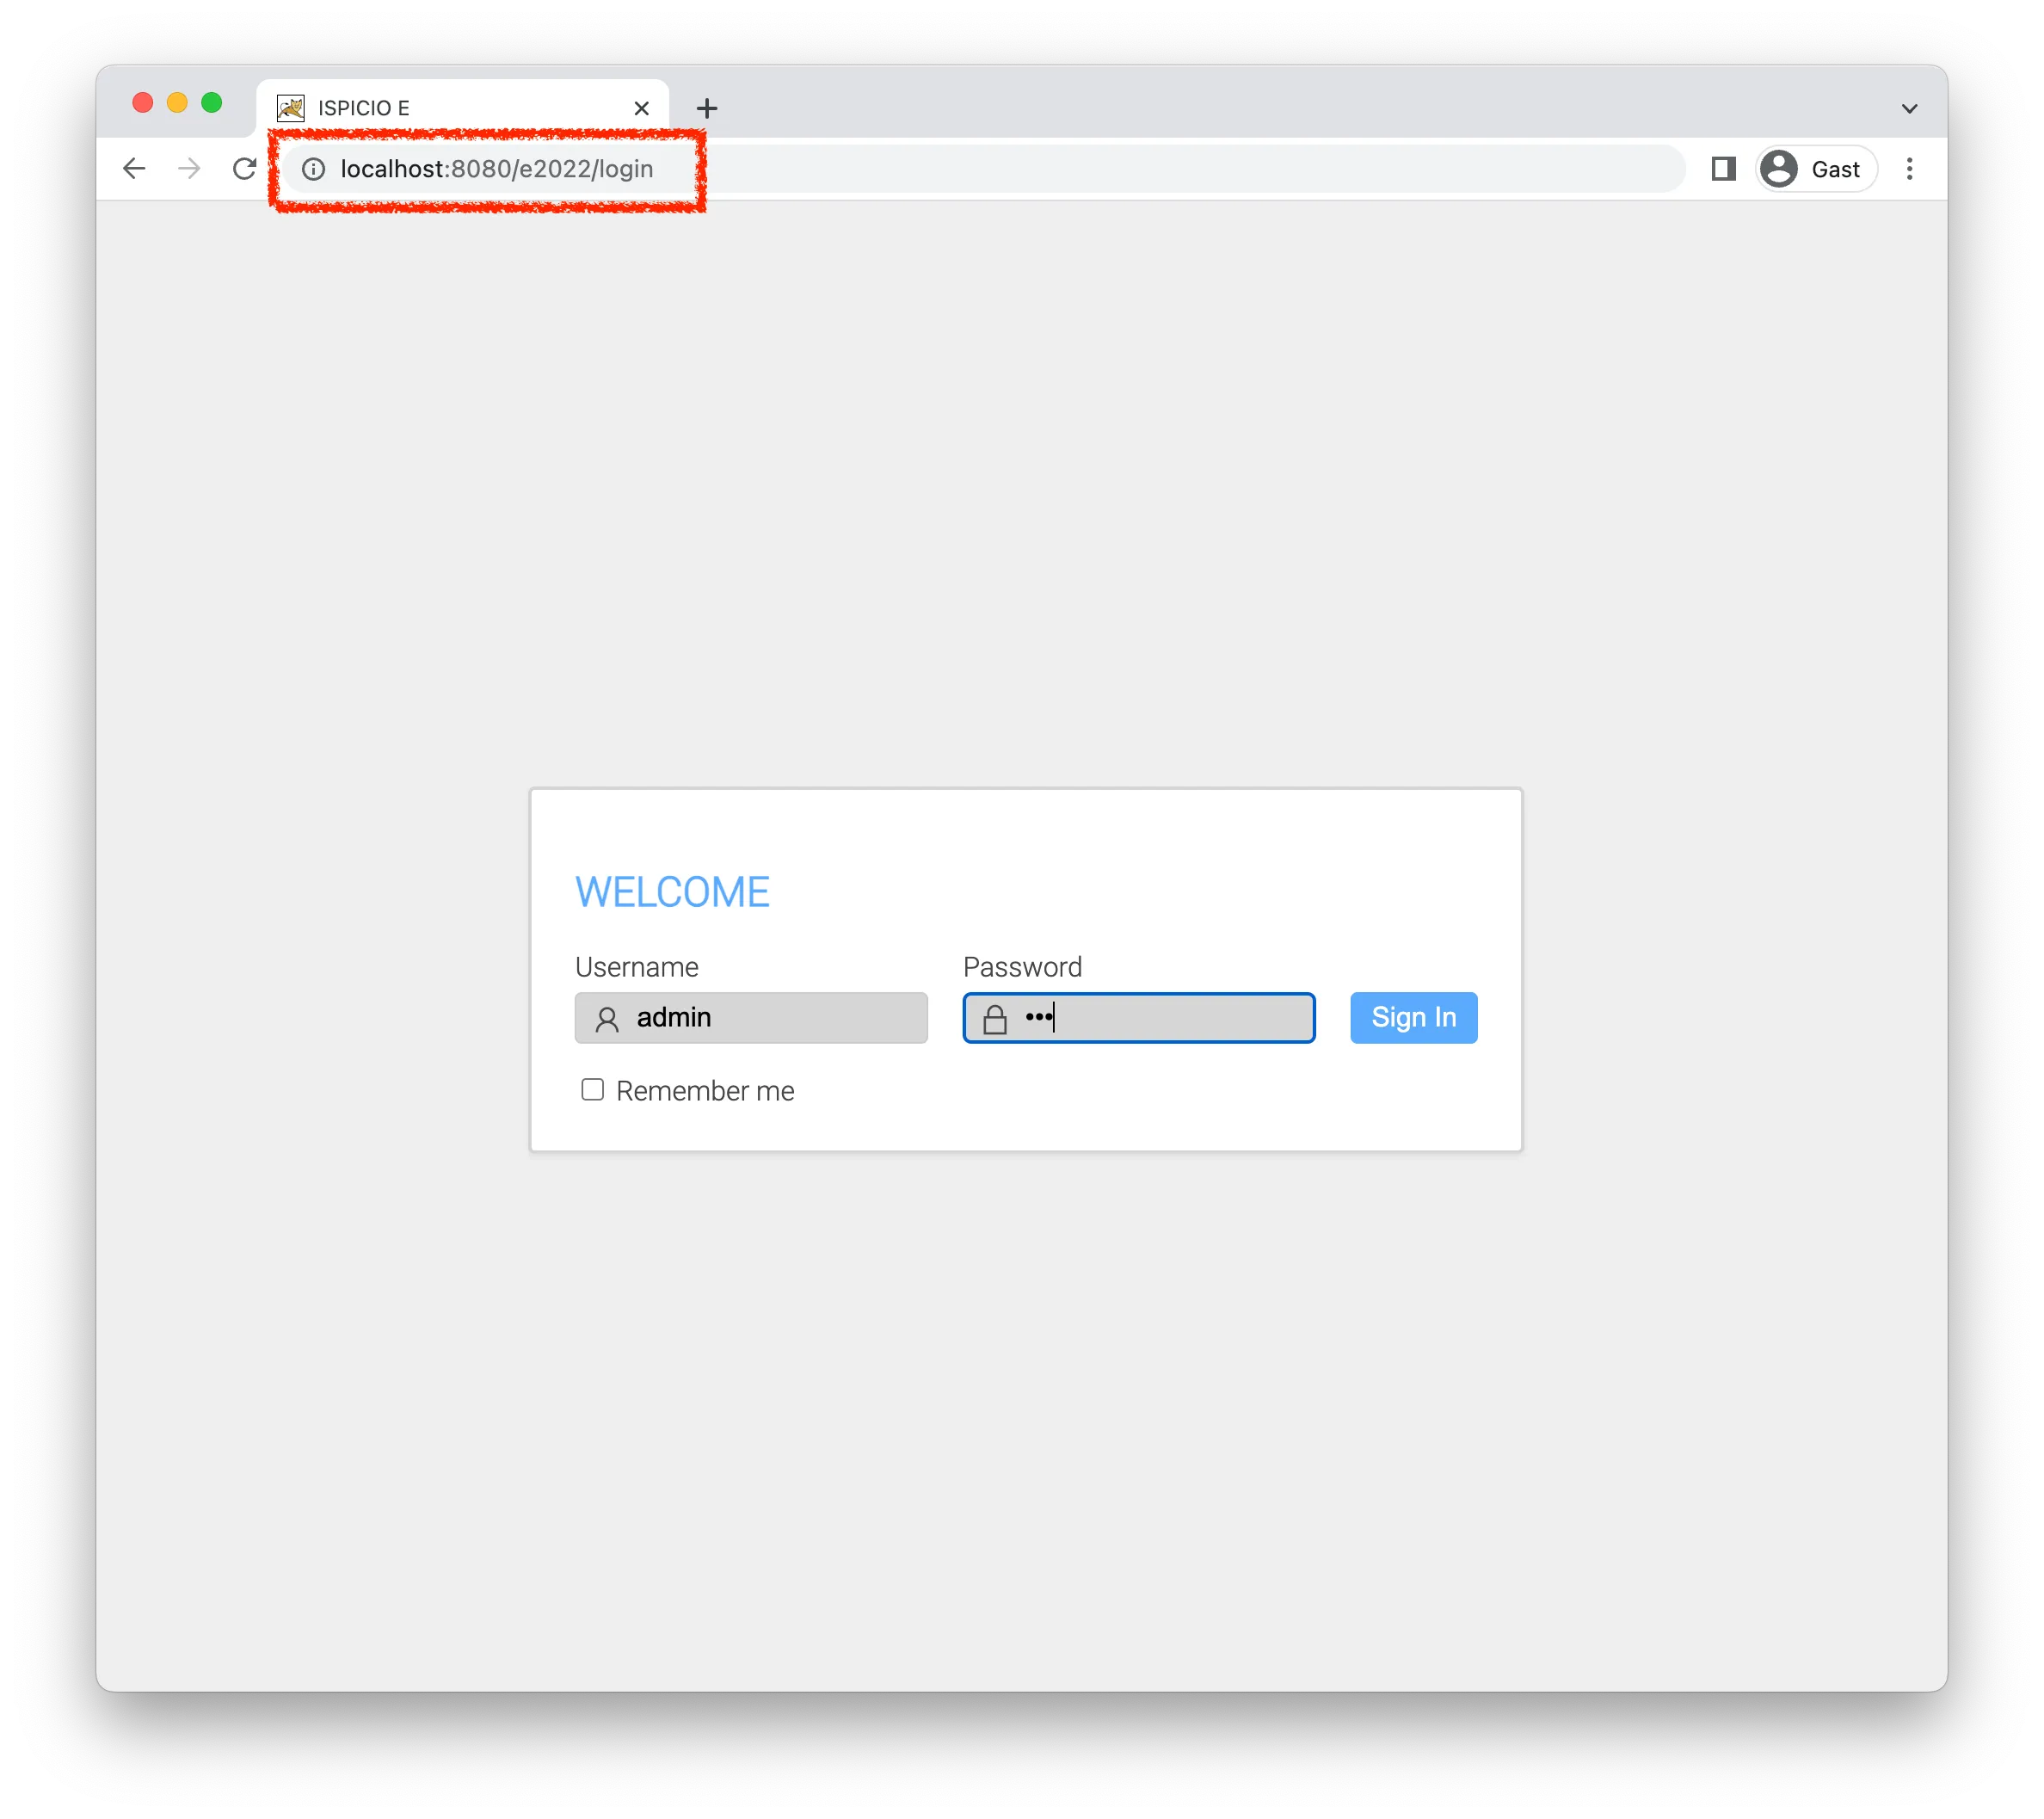
-
Log in with the preset admin account:
Field Value Username adminPassword pwd
Activate the license
You receive the license details from the sales team. To request a license key for the four-week trial, use the contact form.
-
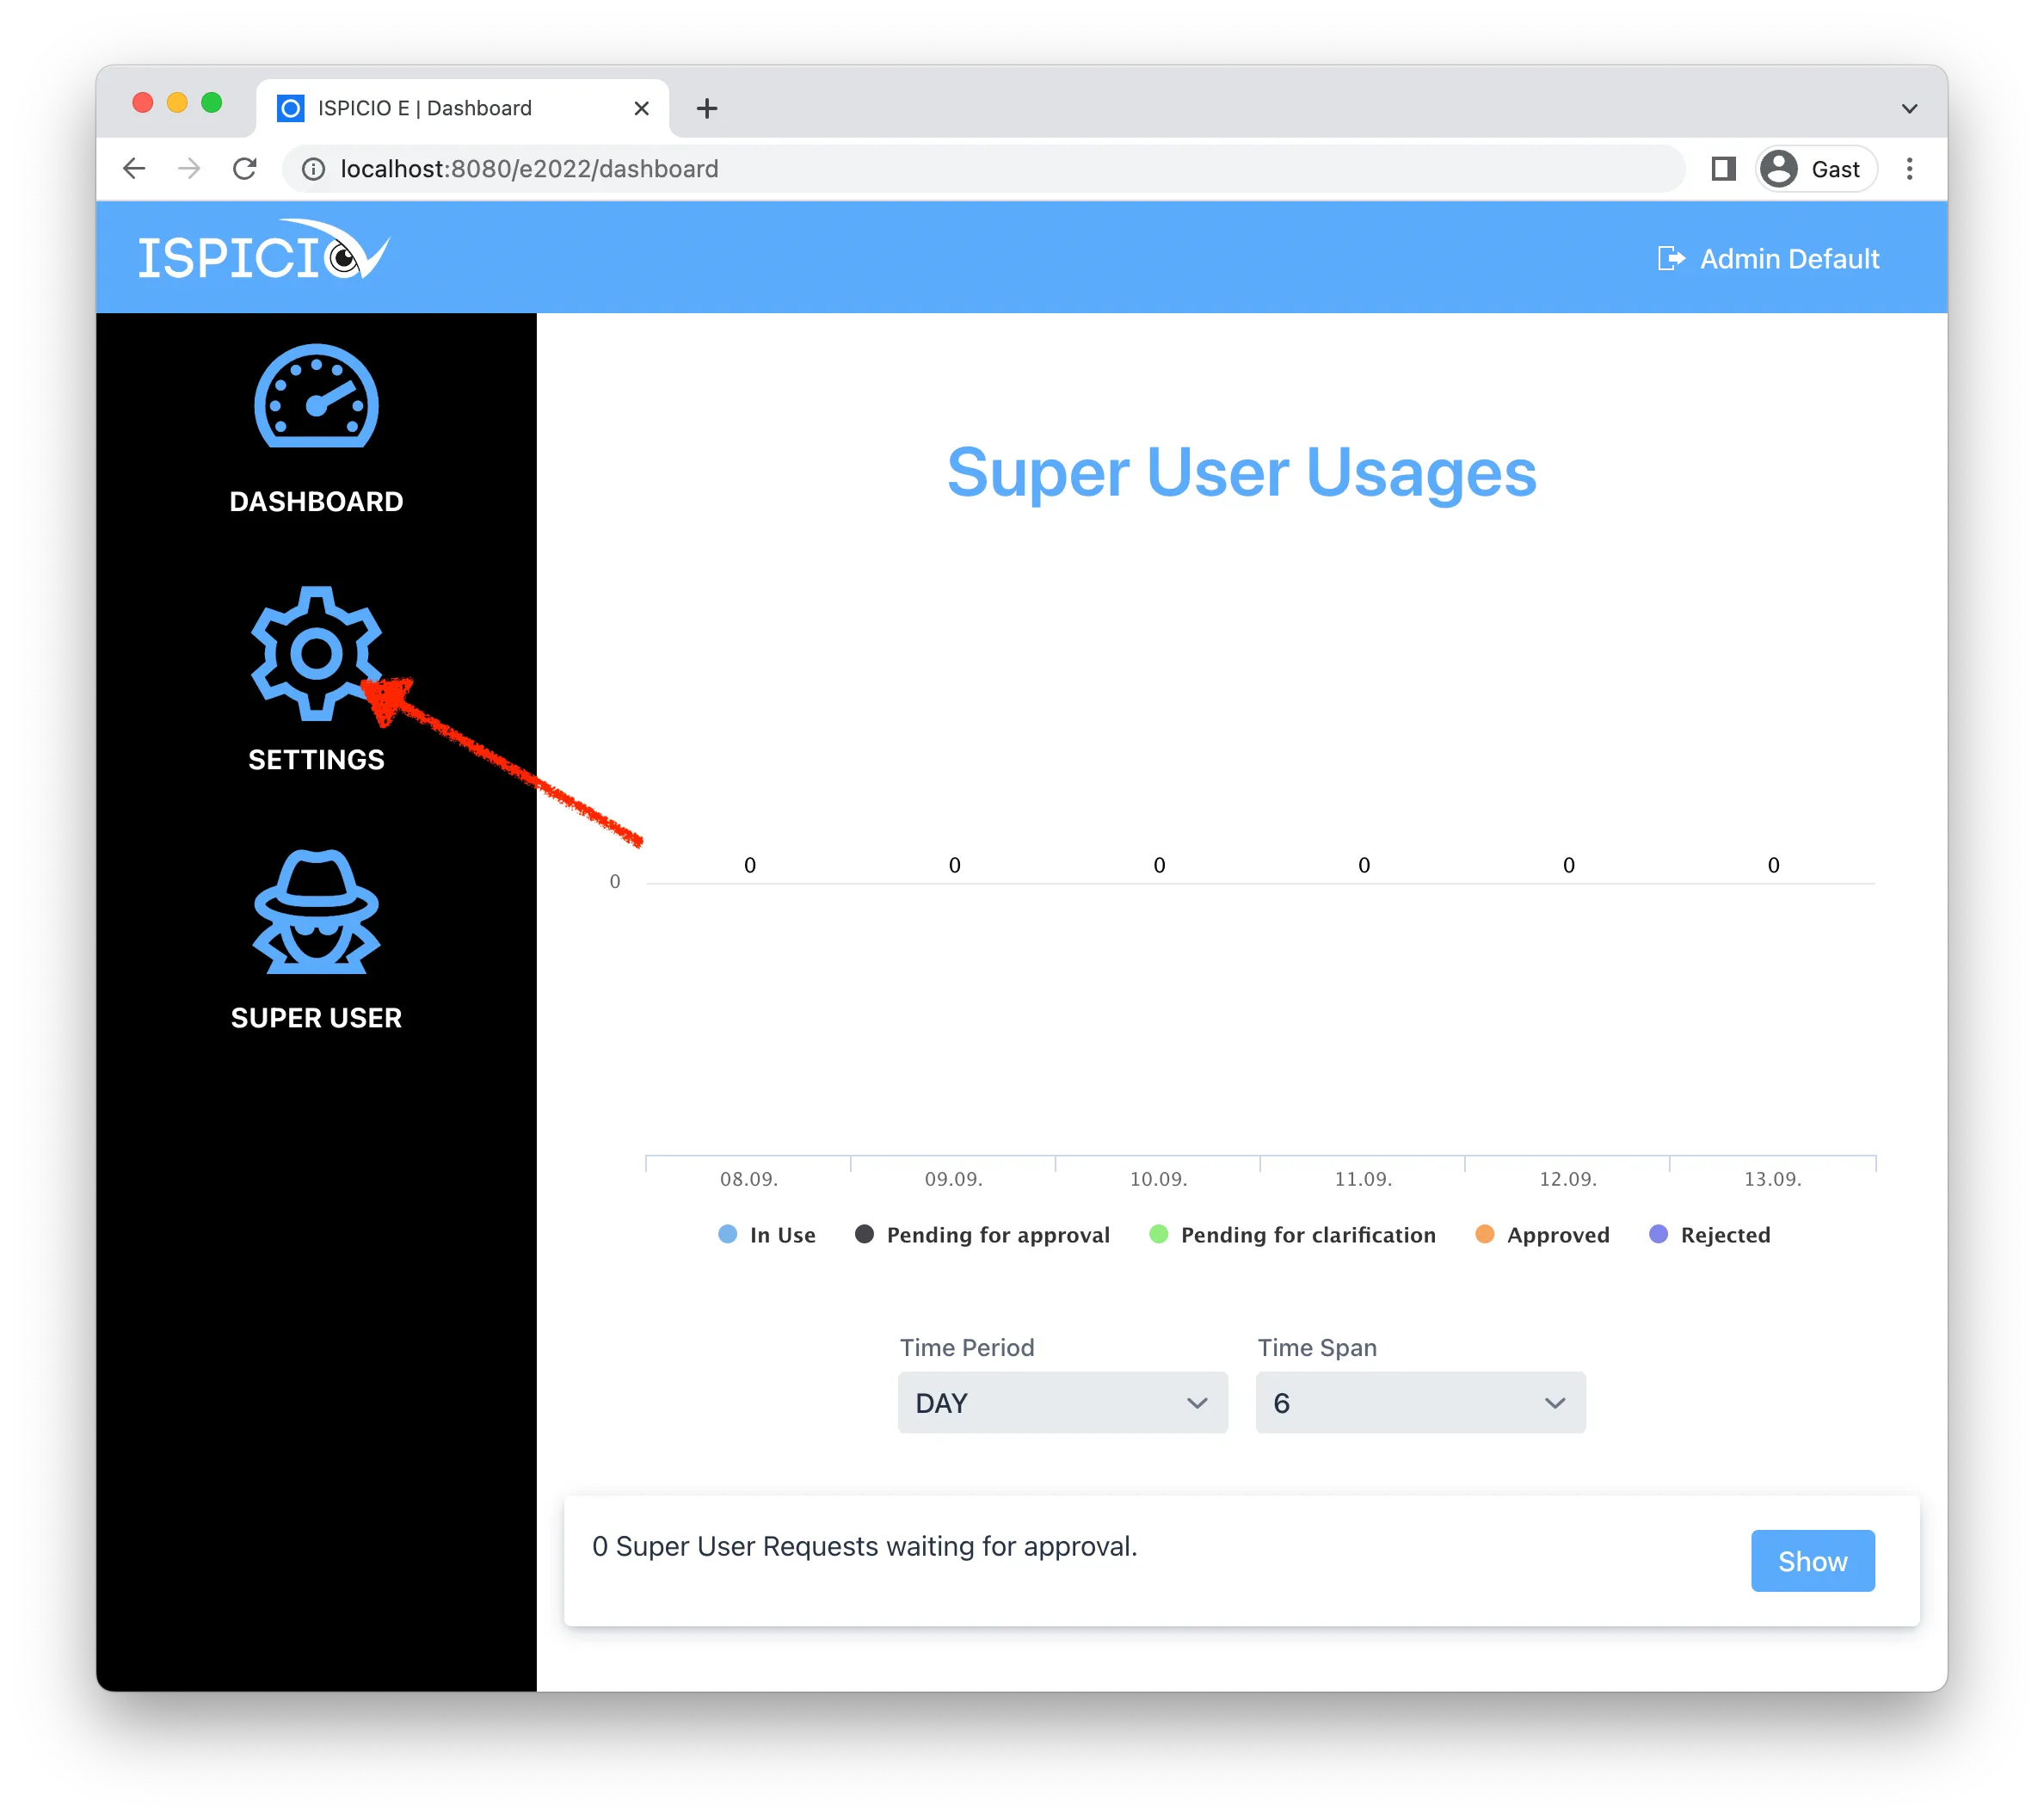
Click SETTINGS in the menu on the left.
-
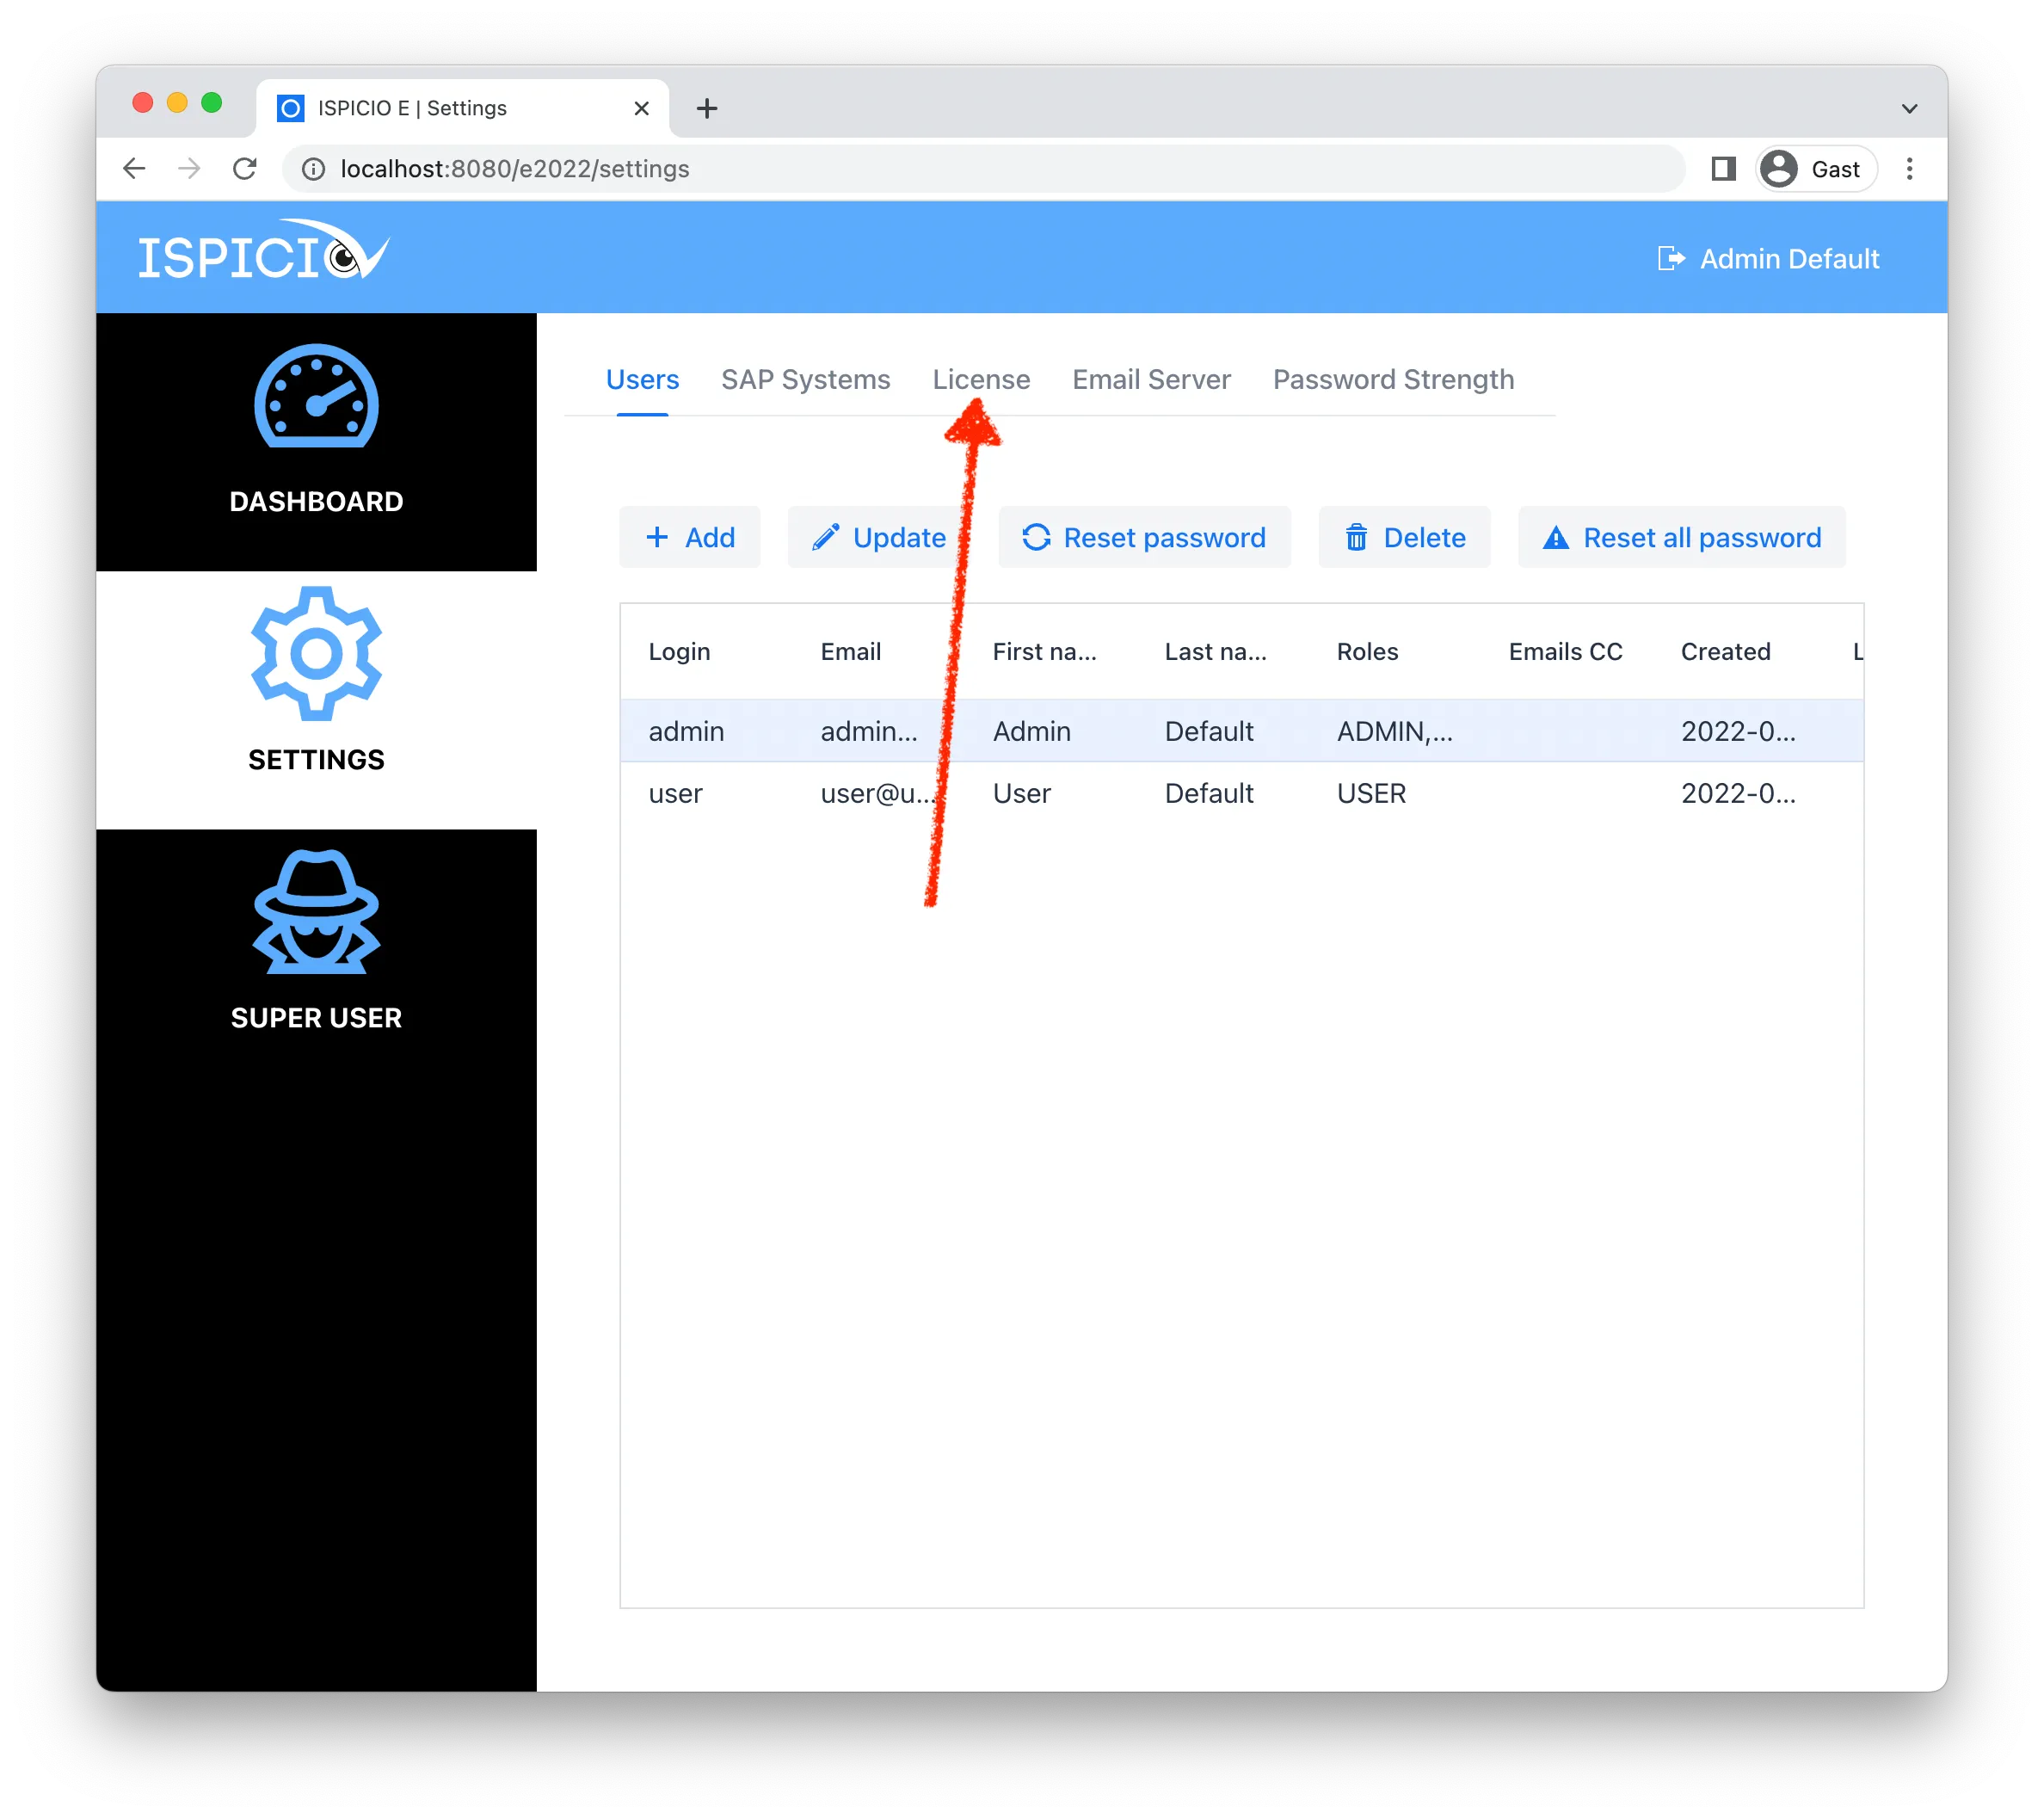
Open the License tab.
-
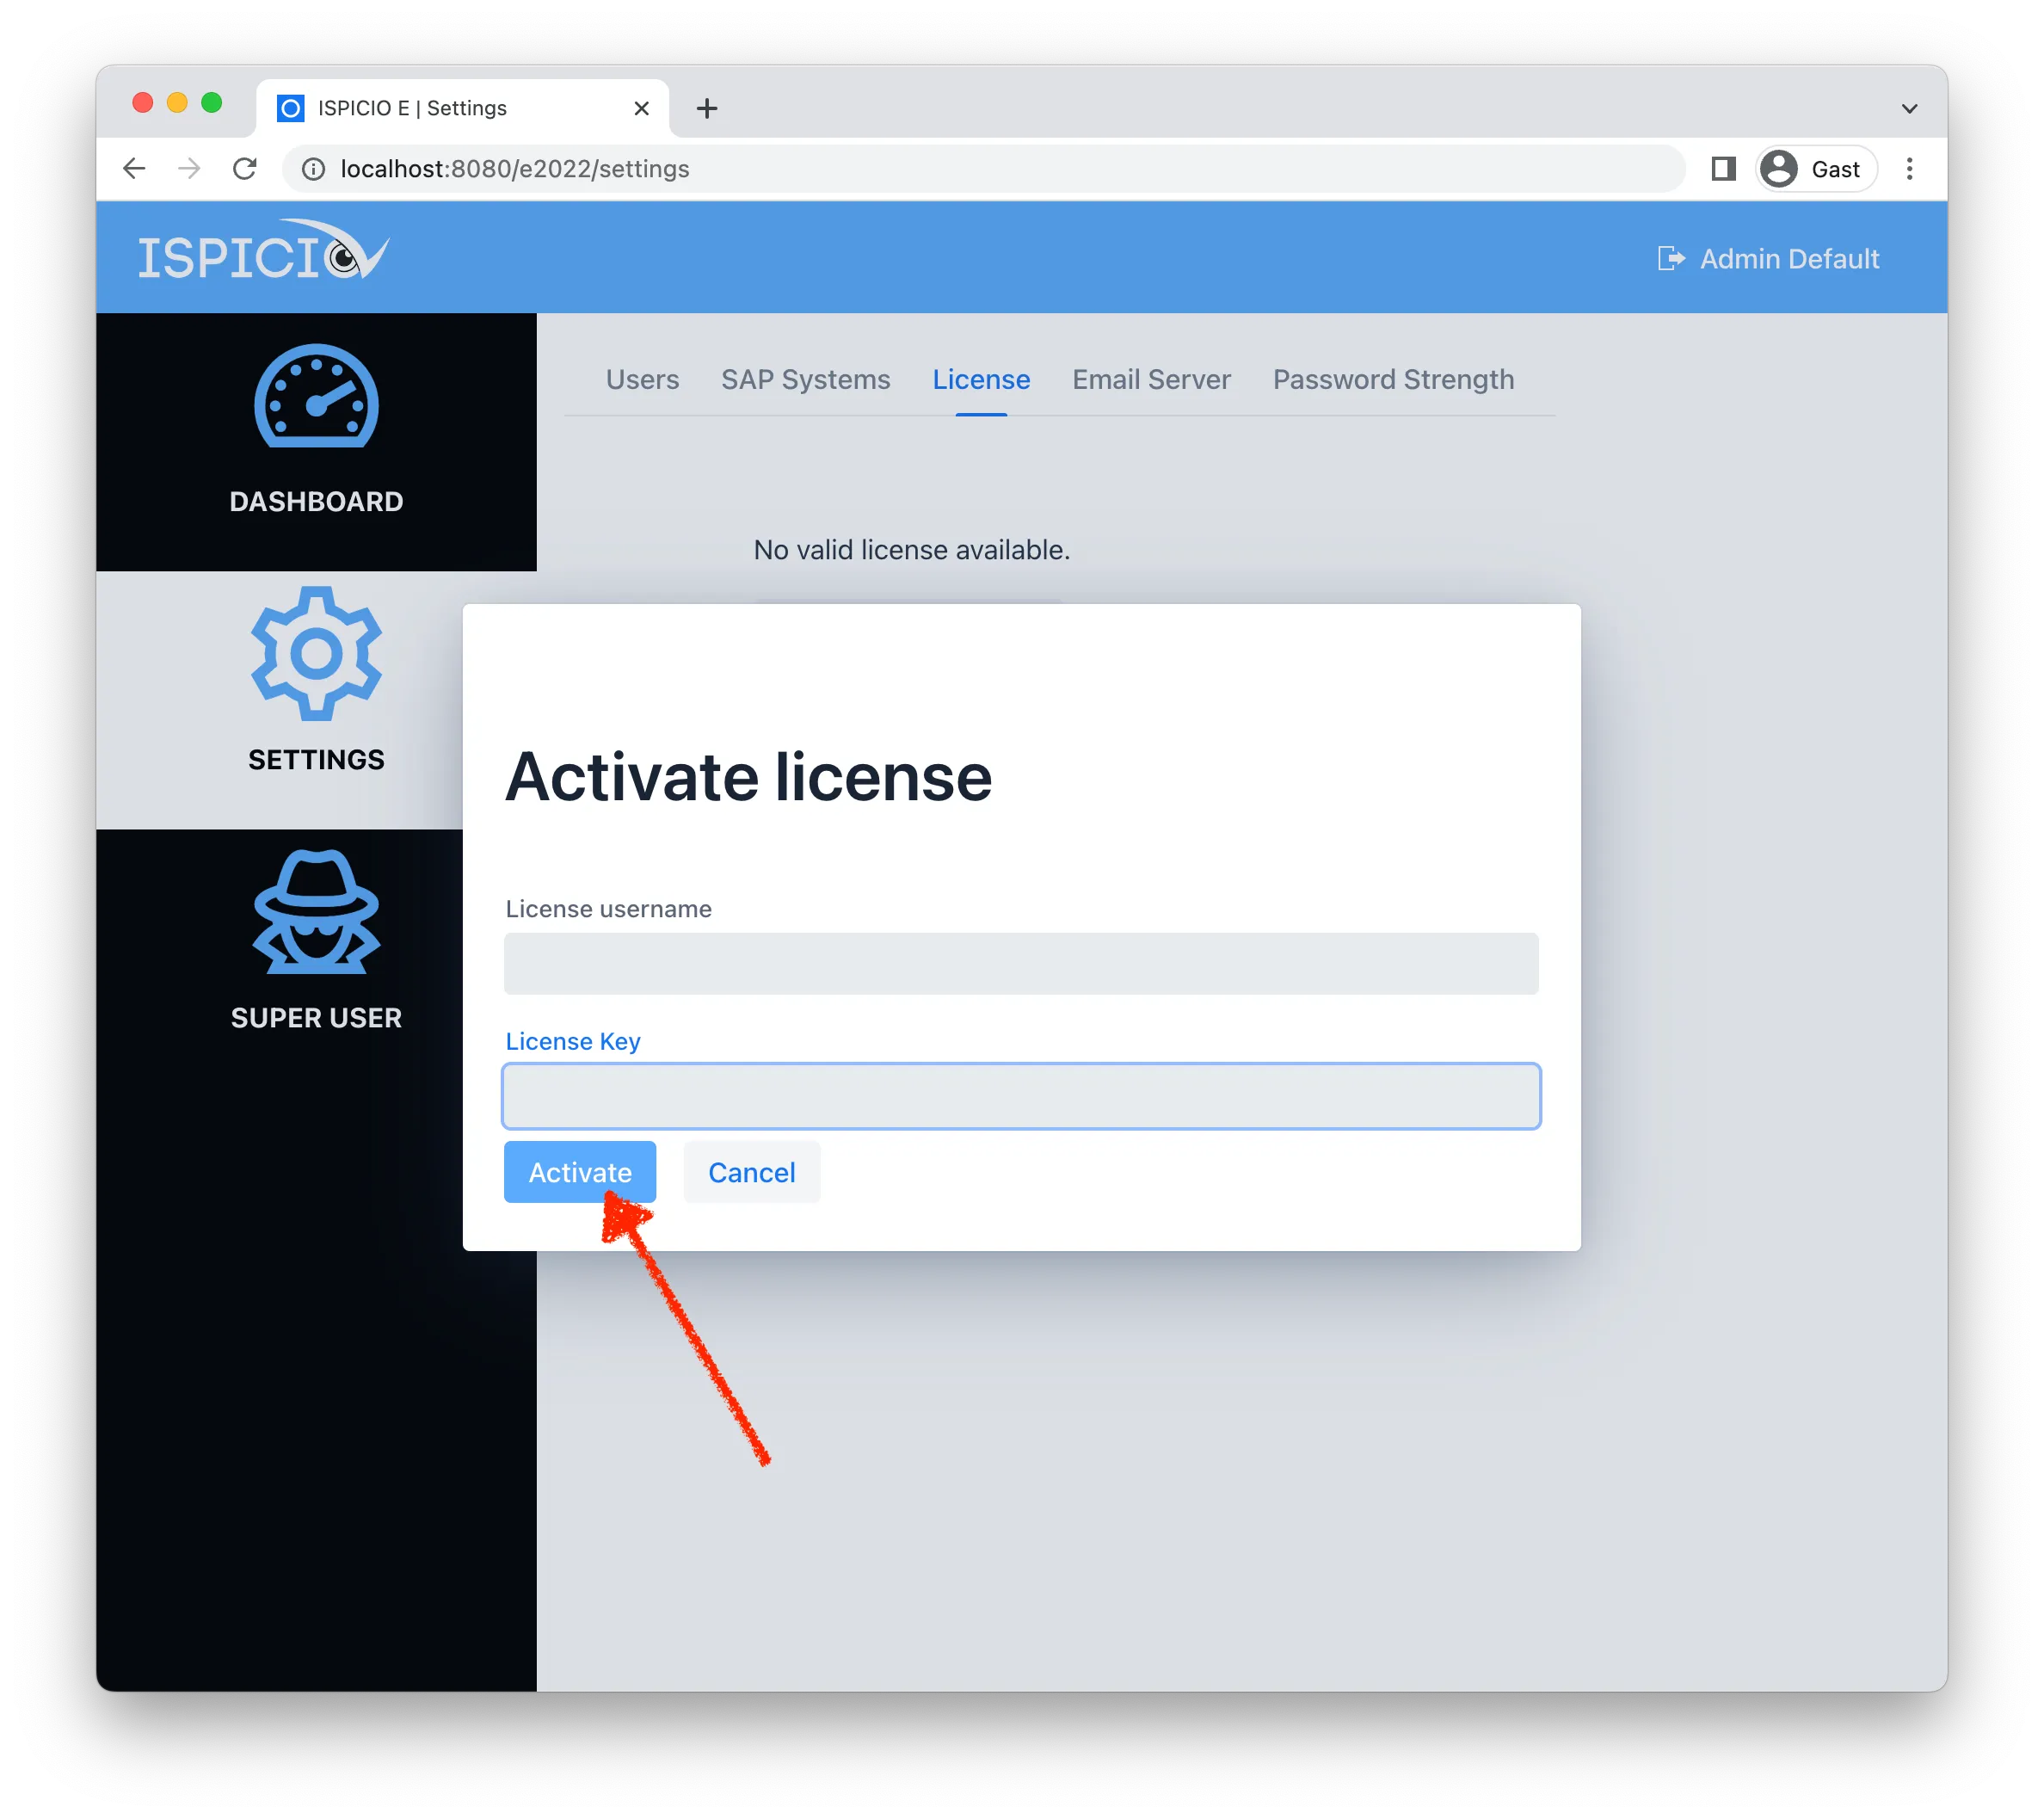
Click Activate new license.

-
In the Activate license window, enter License username and License Key and click Activate.
-
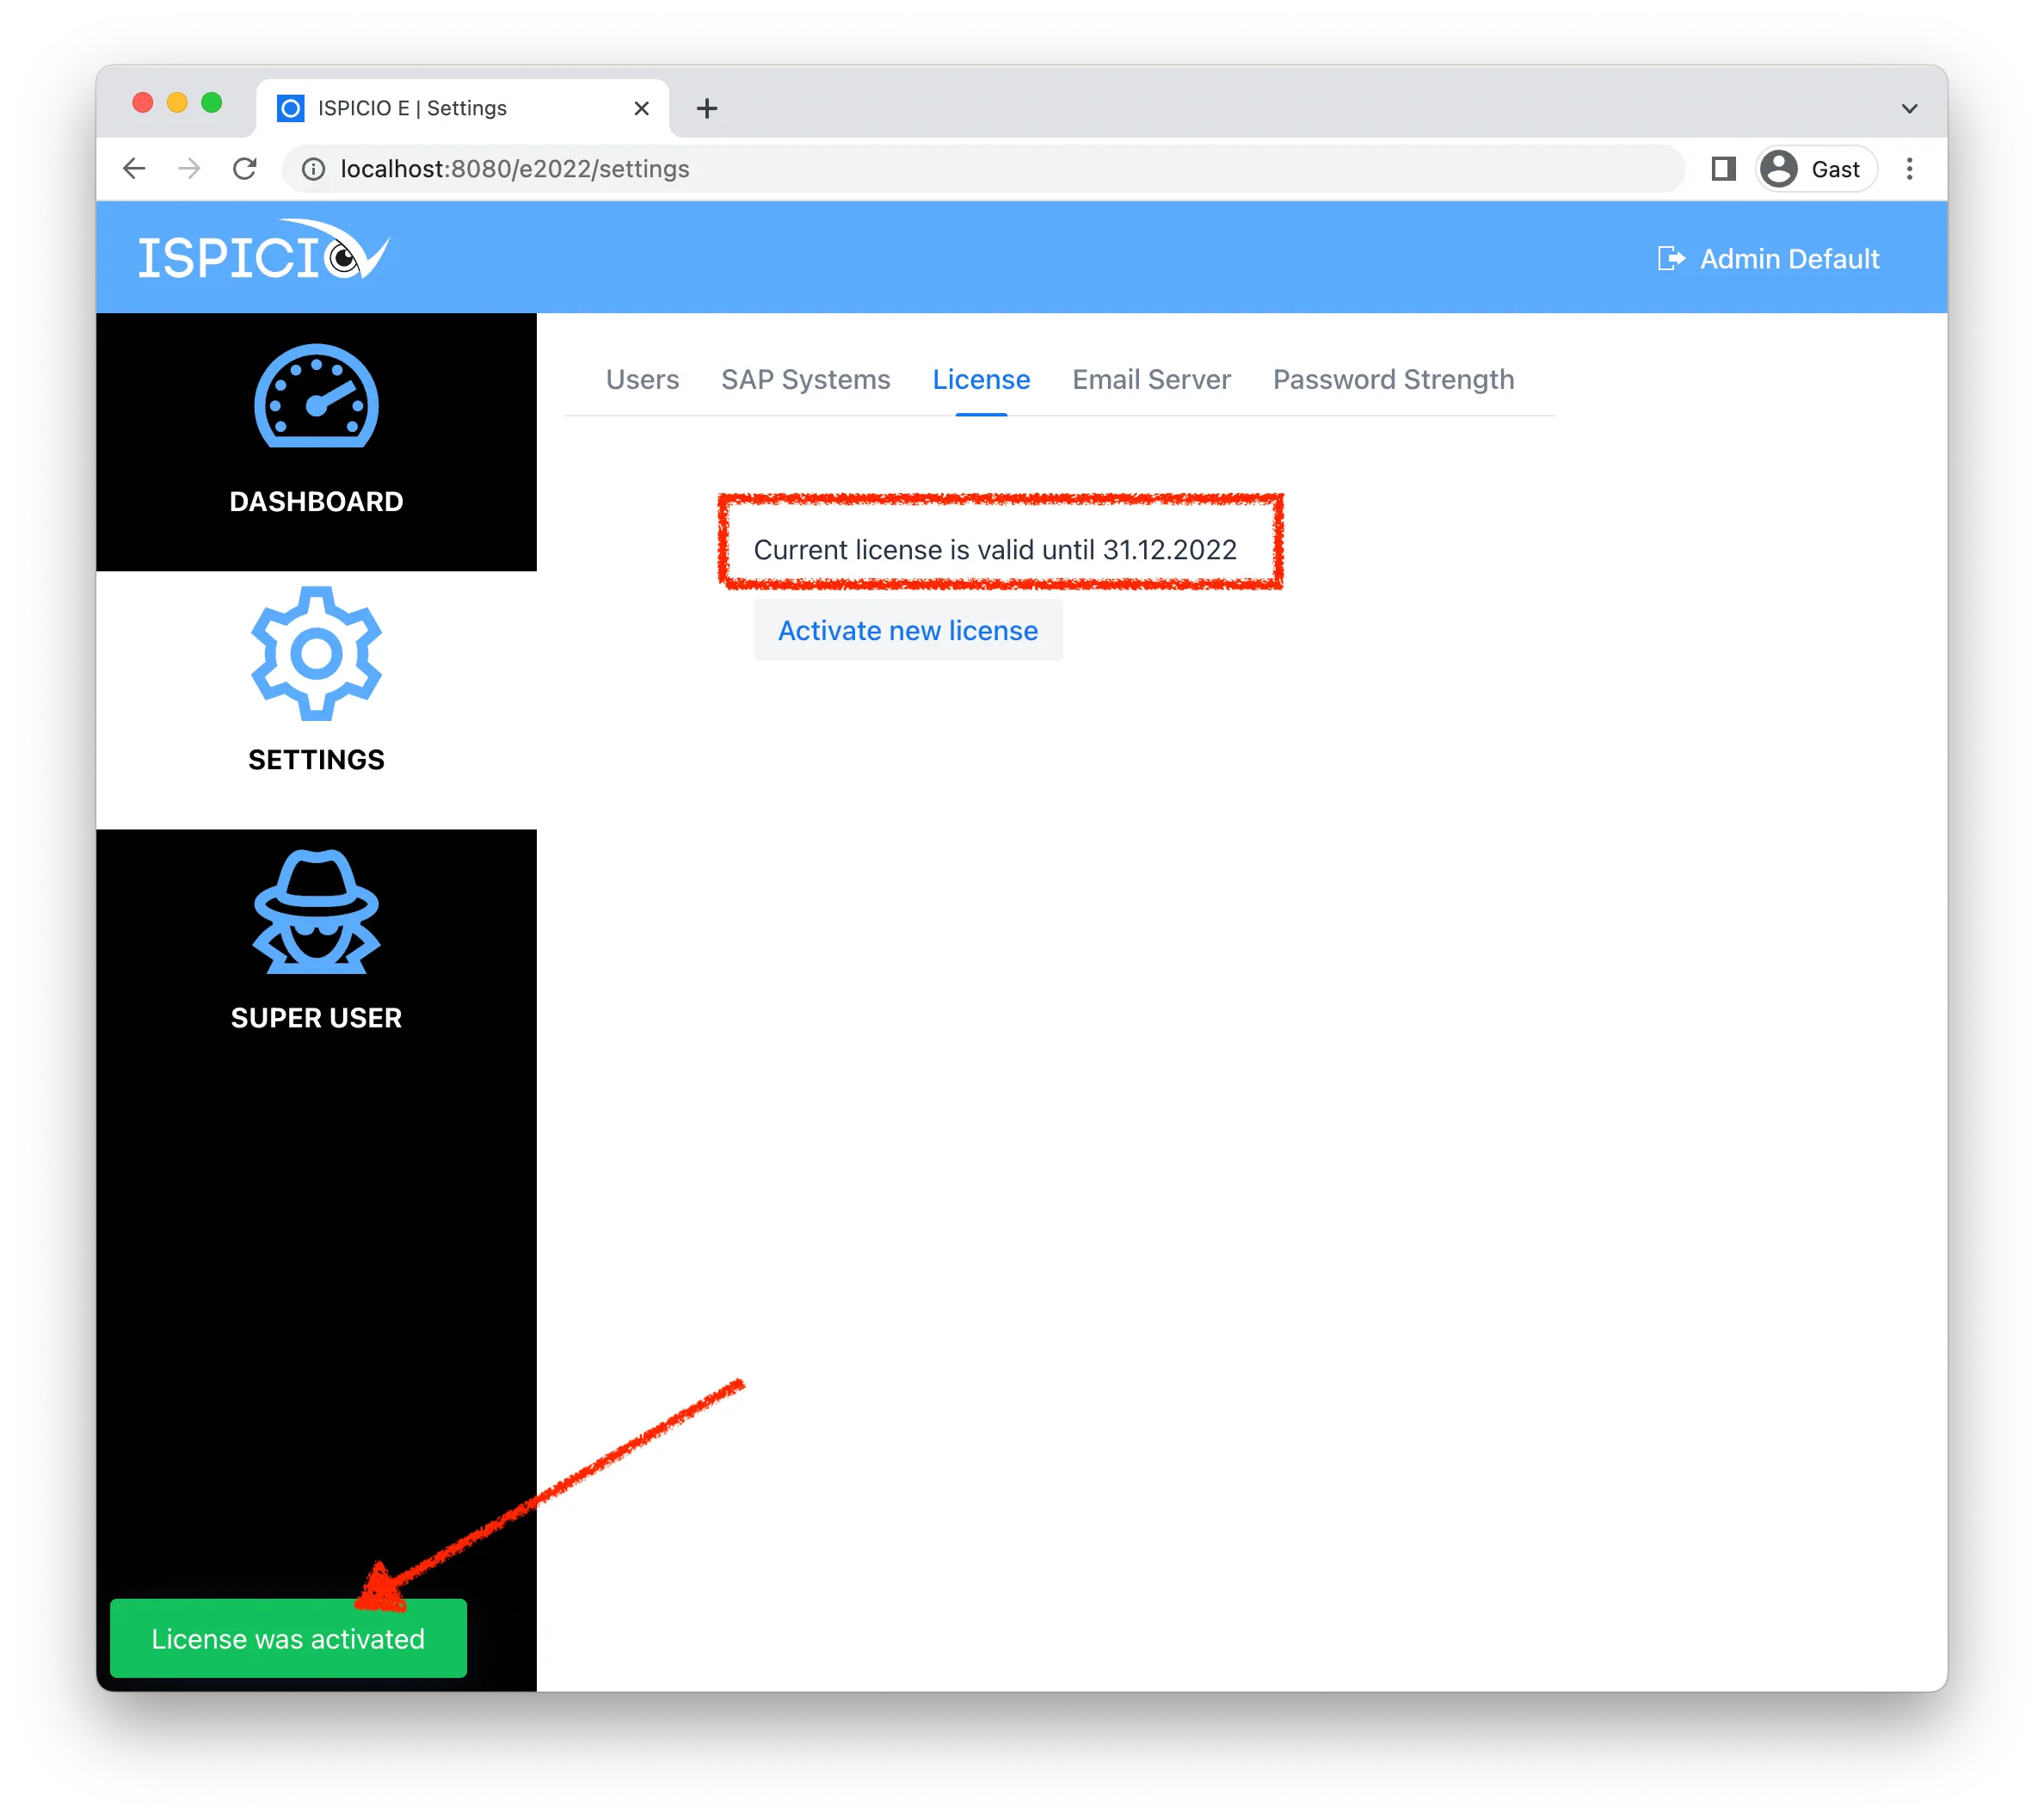
If the license is valid, ISPICIO_E shows the expiration date (Current license is valid until …) and the message License was activated at the bottom left.
Define the password rules
Before you create users, define the password rules according to your internal requirements.
-
Open the Password Strength tab.
-
Enter the minimum values:
- Minimal number of digits
- Minimal number of letters
- Minimal length
- Minimal number of lower-case characters
- Minimal number of upper-case characters
- Minimal number of special characters
-
Click Save.
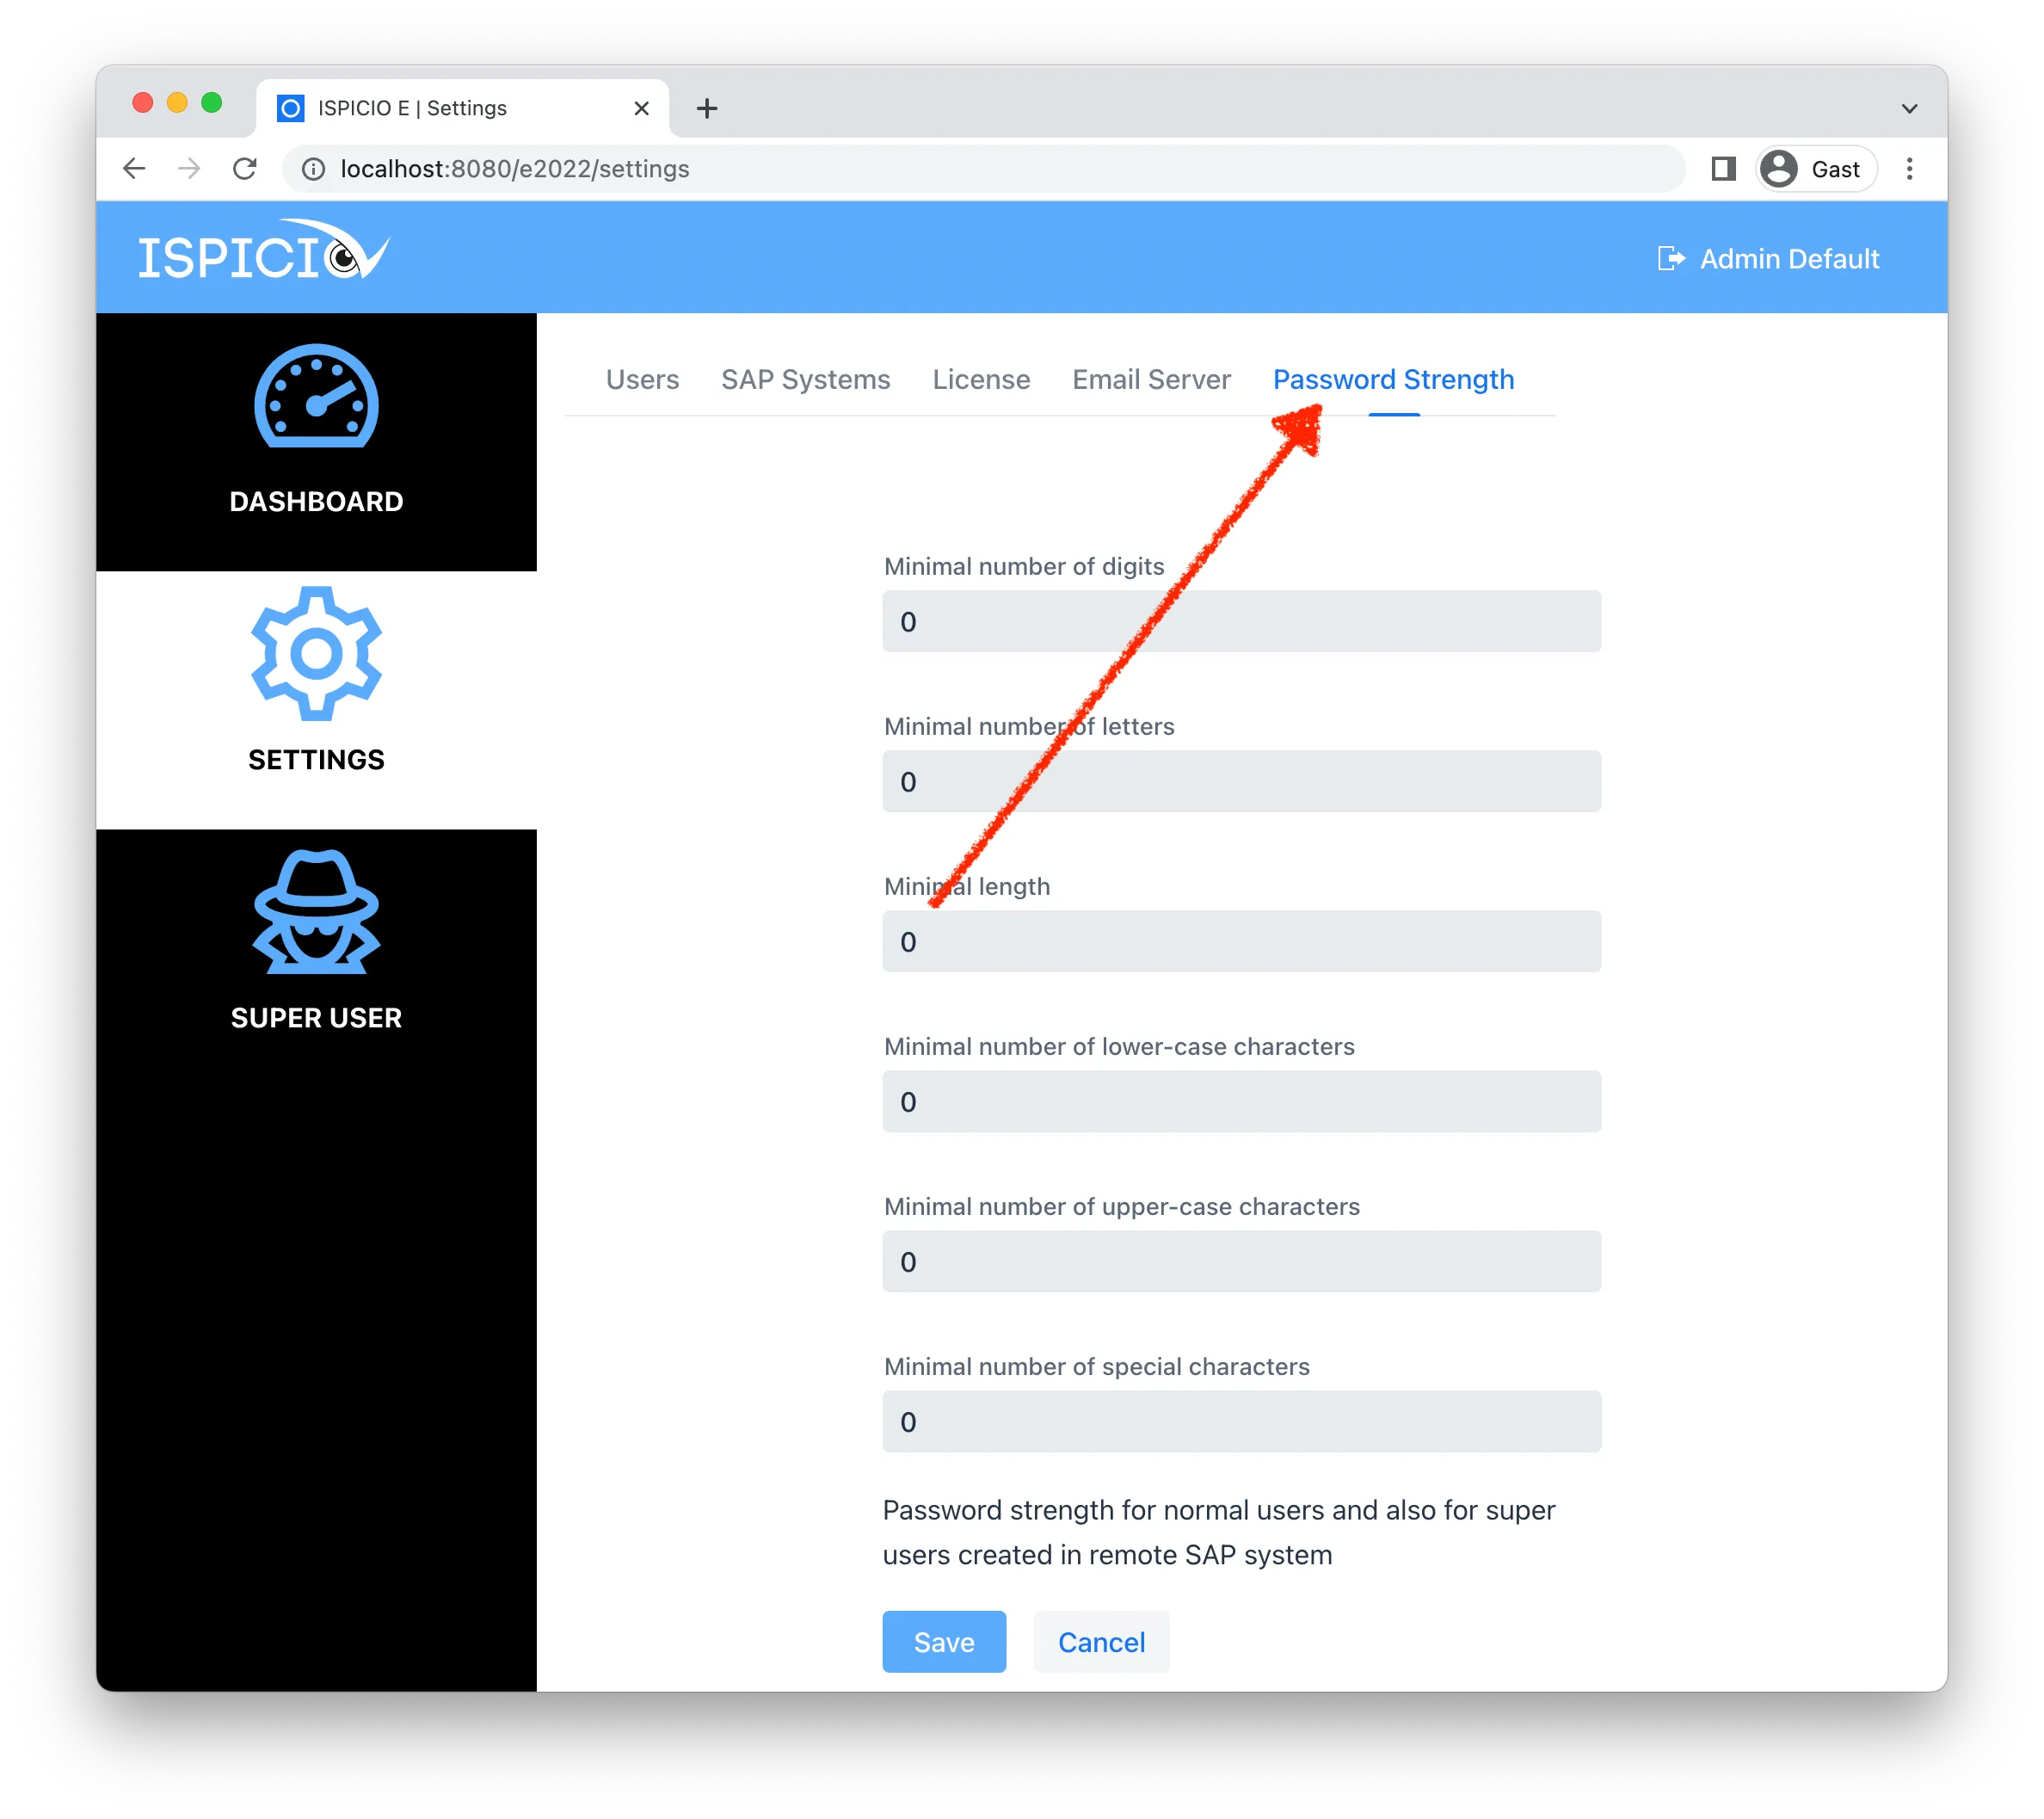
The rules apply to the users of ISPICIO_E and to the emergency users that ISPICIO_E creates in the SAP system.
Connect the email server
ISPICIO_E uses the email server to send passwords to new users and queries to the users concerned.
-
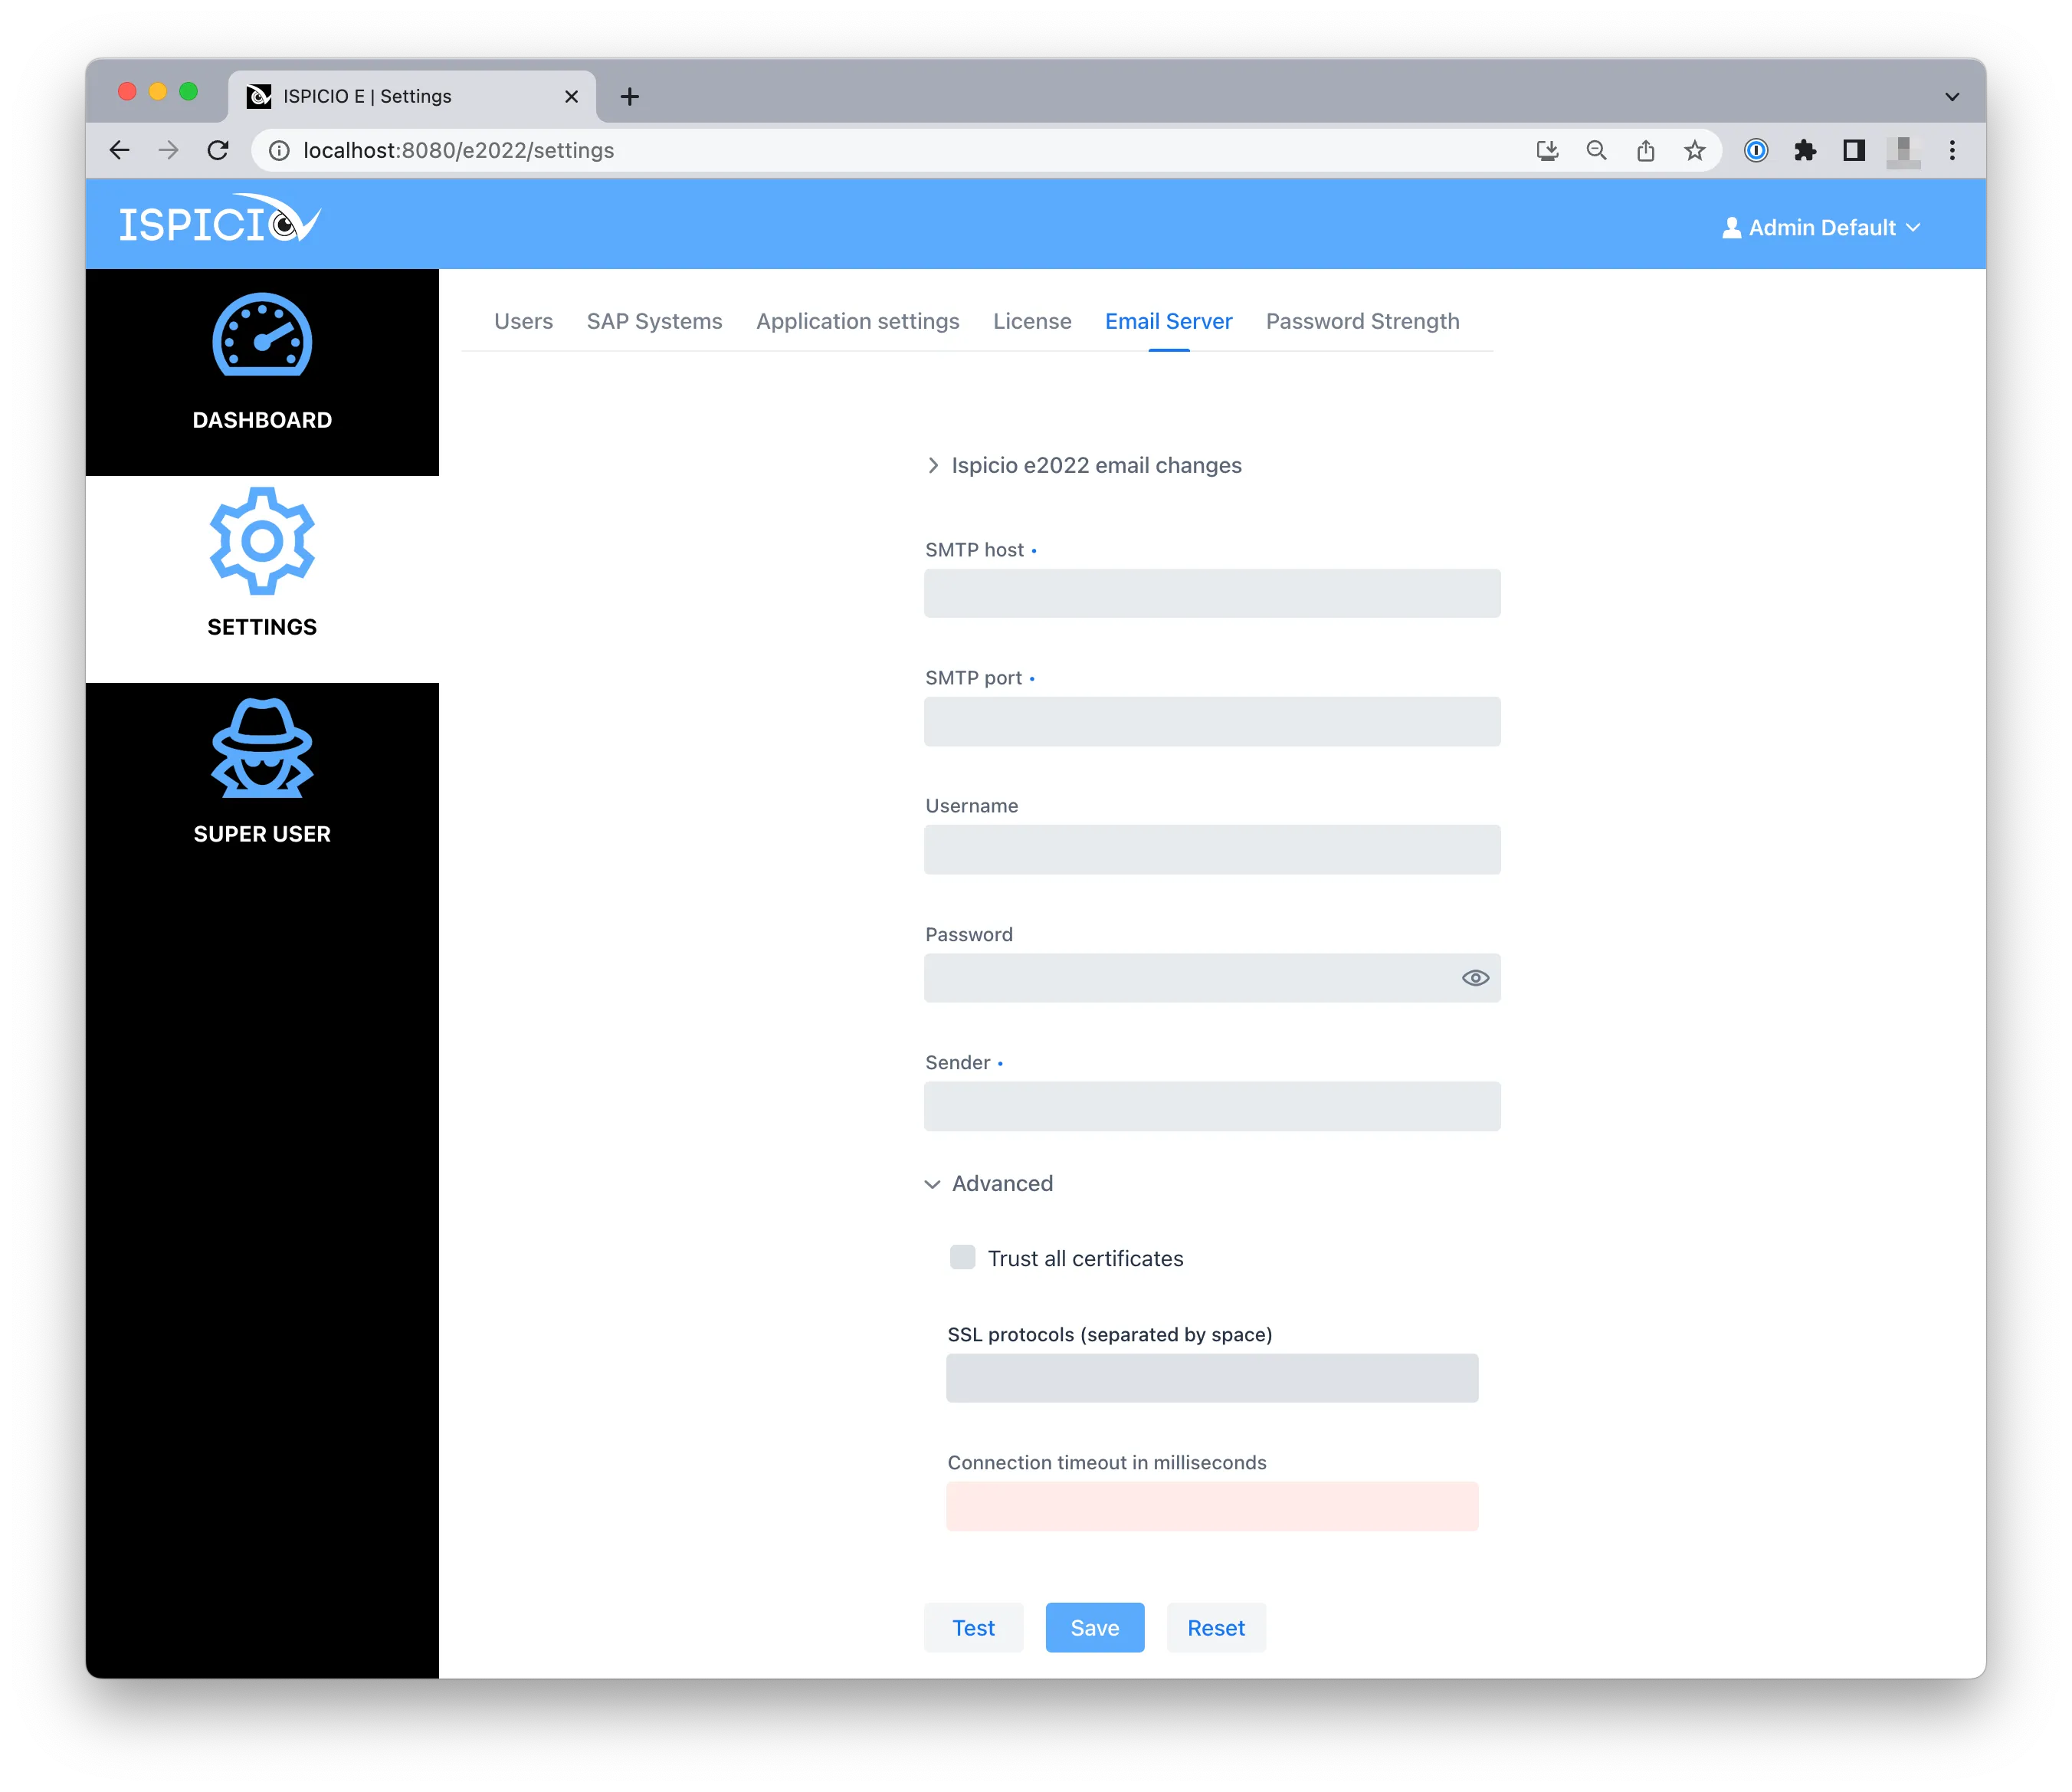
Open the Email Server tab.
-
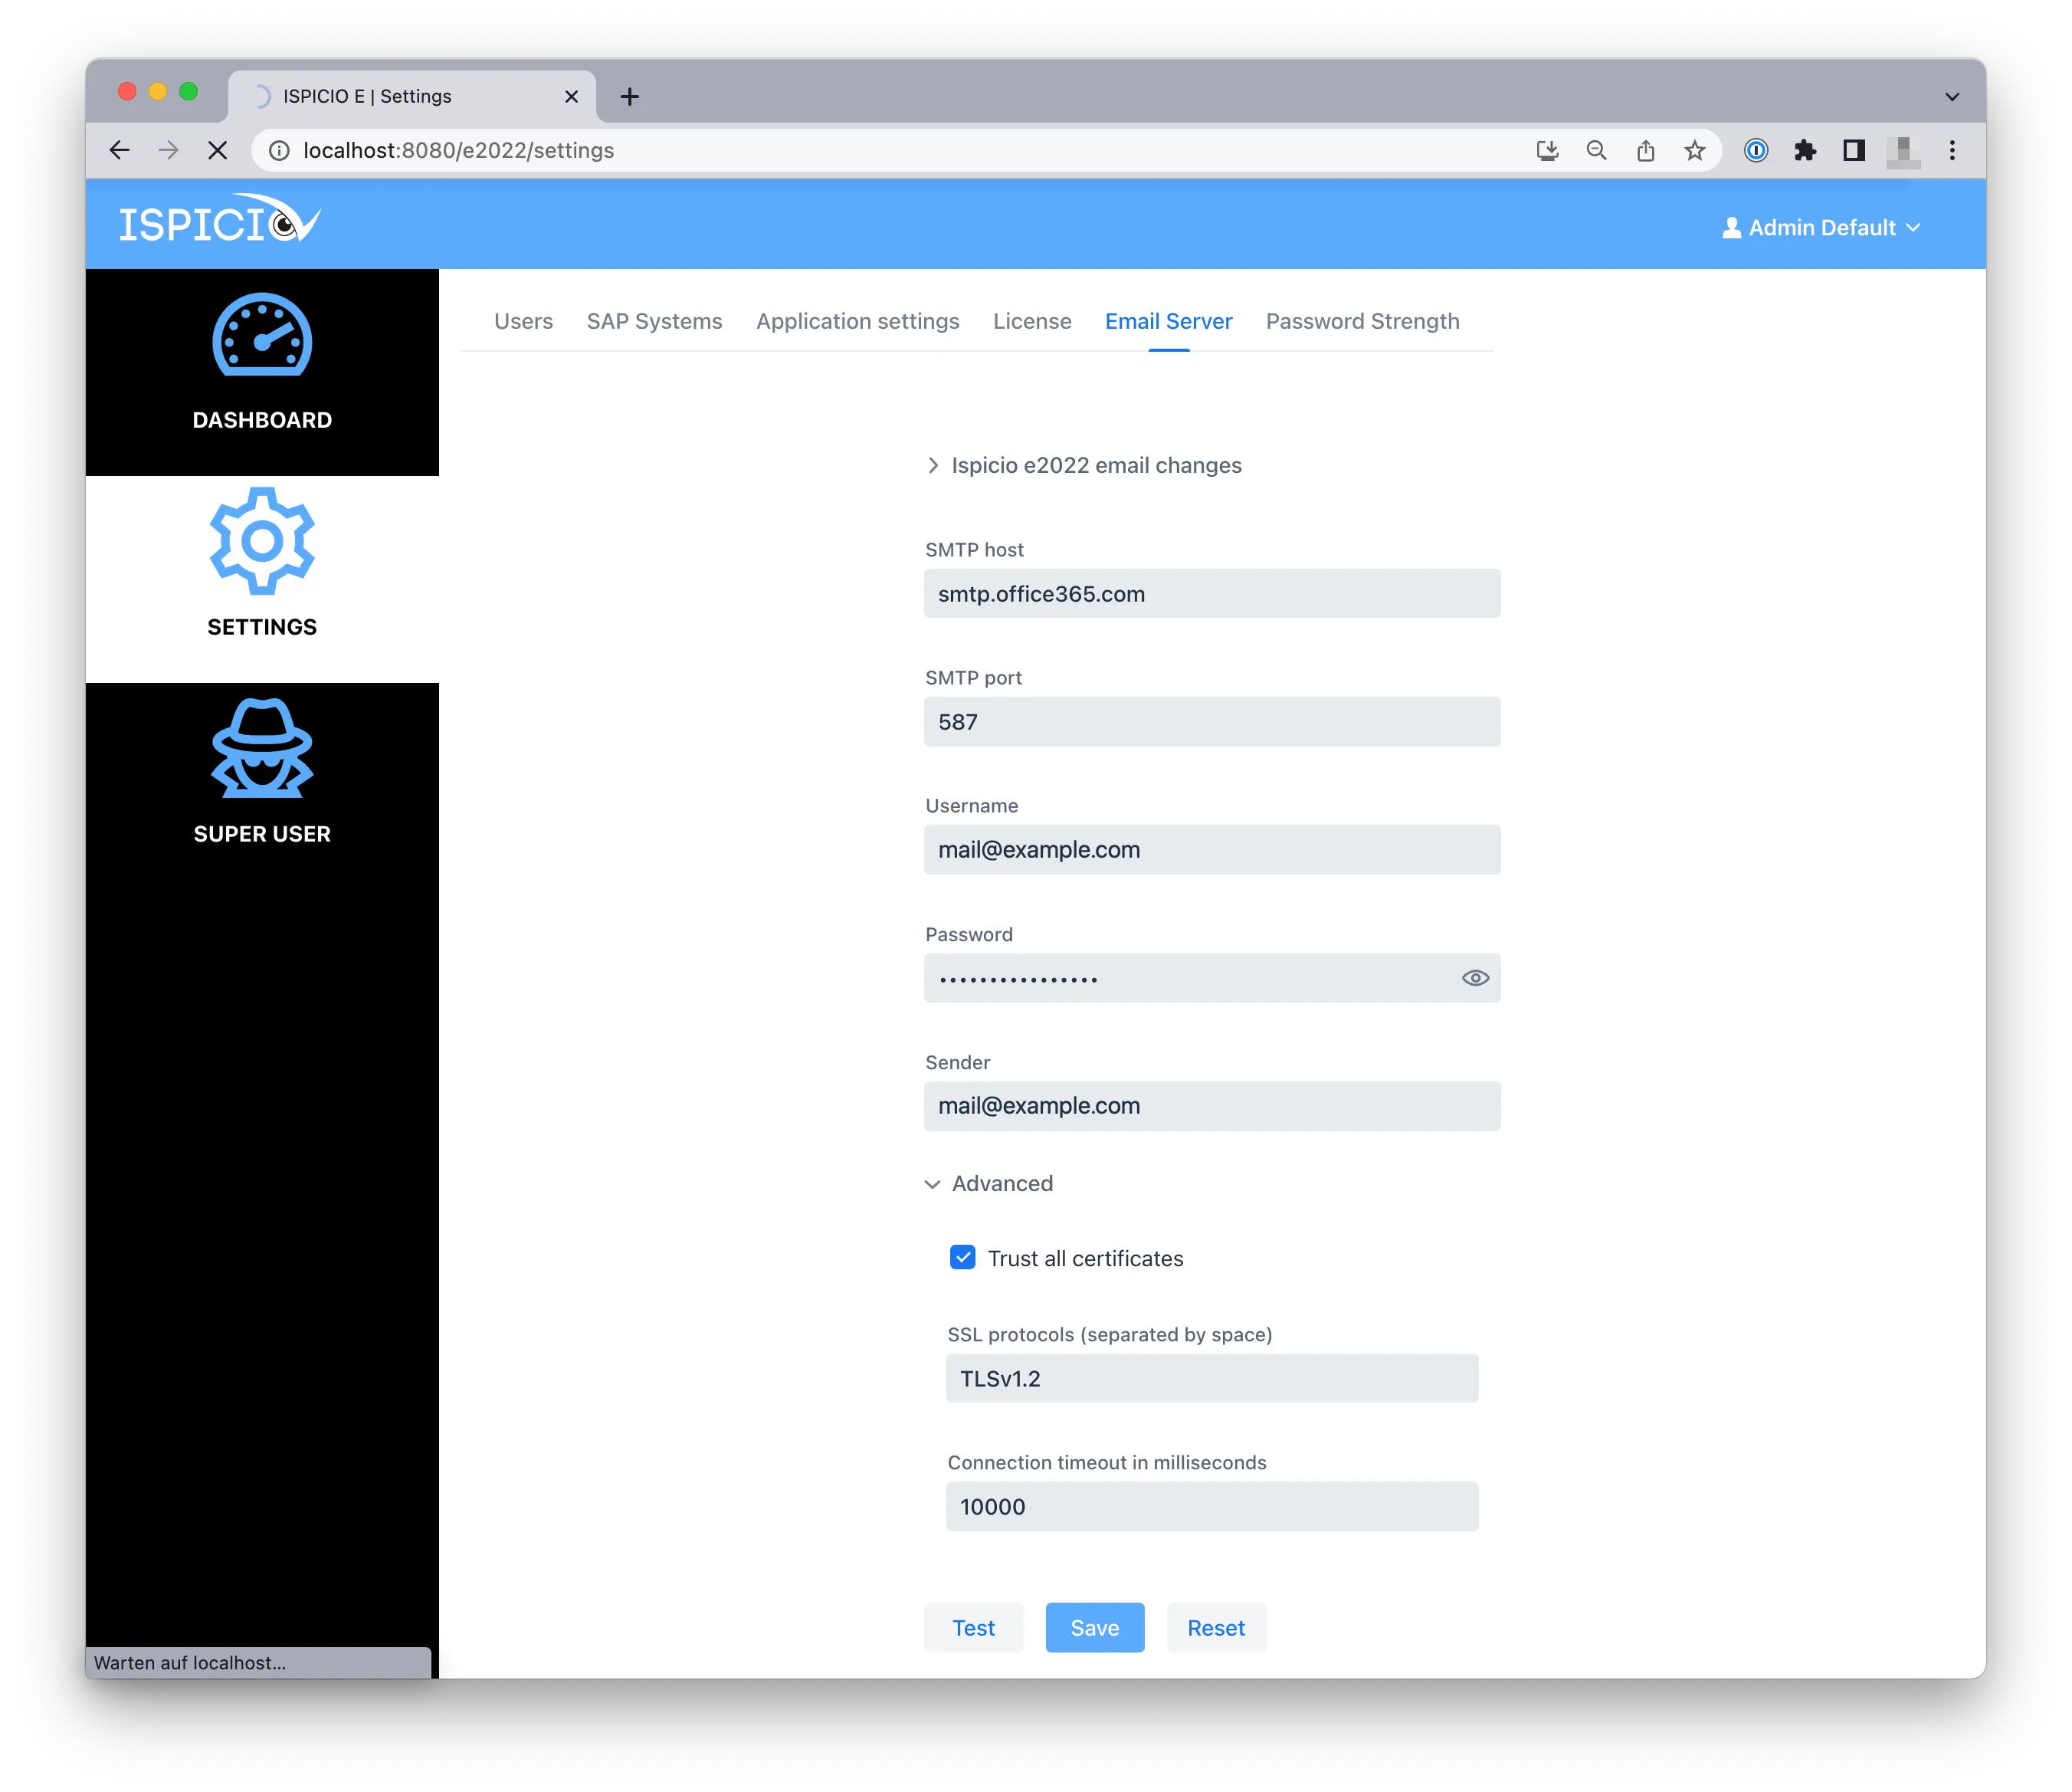
Enter the connection details of the email server: SMTP host, SMTP port, Username, Password and Sender. SMTP host, SMTP port and Sender are mandatory.
-
Click Save.
Connect an SAP system
The SAP system must be prepared first: an active Security Audit Log and an interface user for the RFC connection. See Preparations in SAP.
-
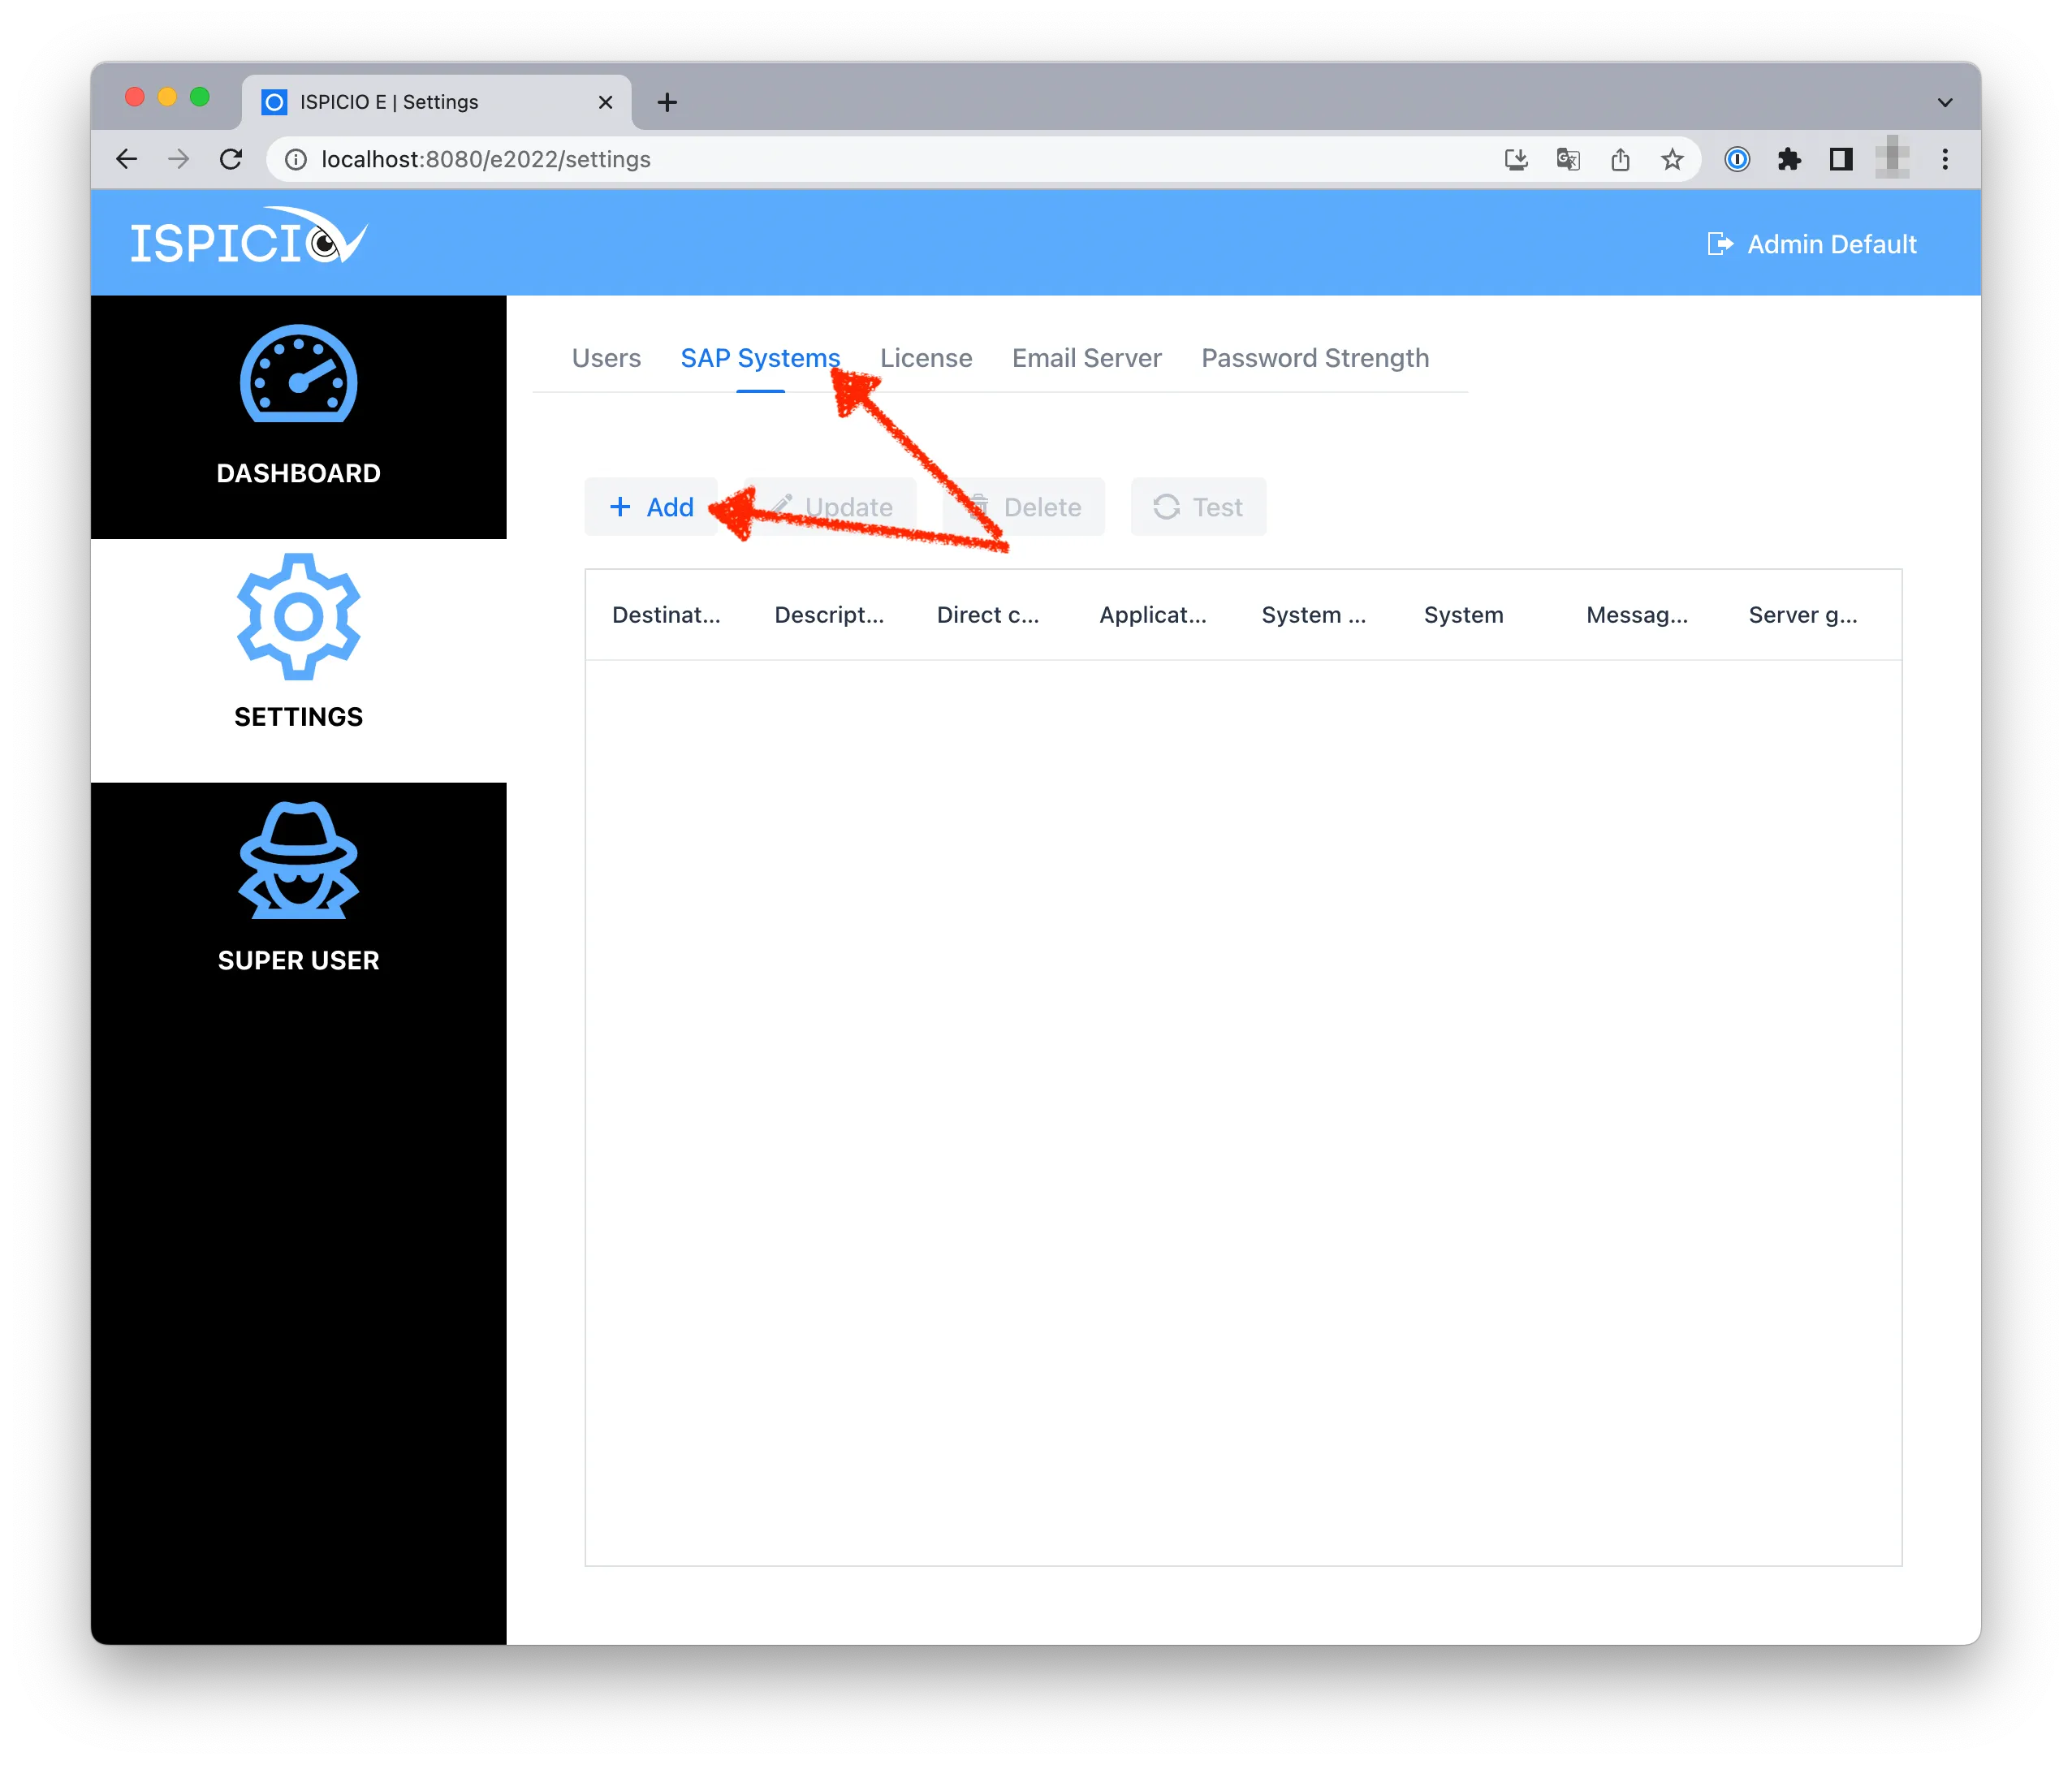
Open the SAP Systems tab and click Add.
-
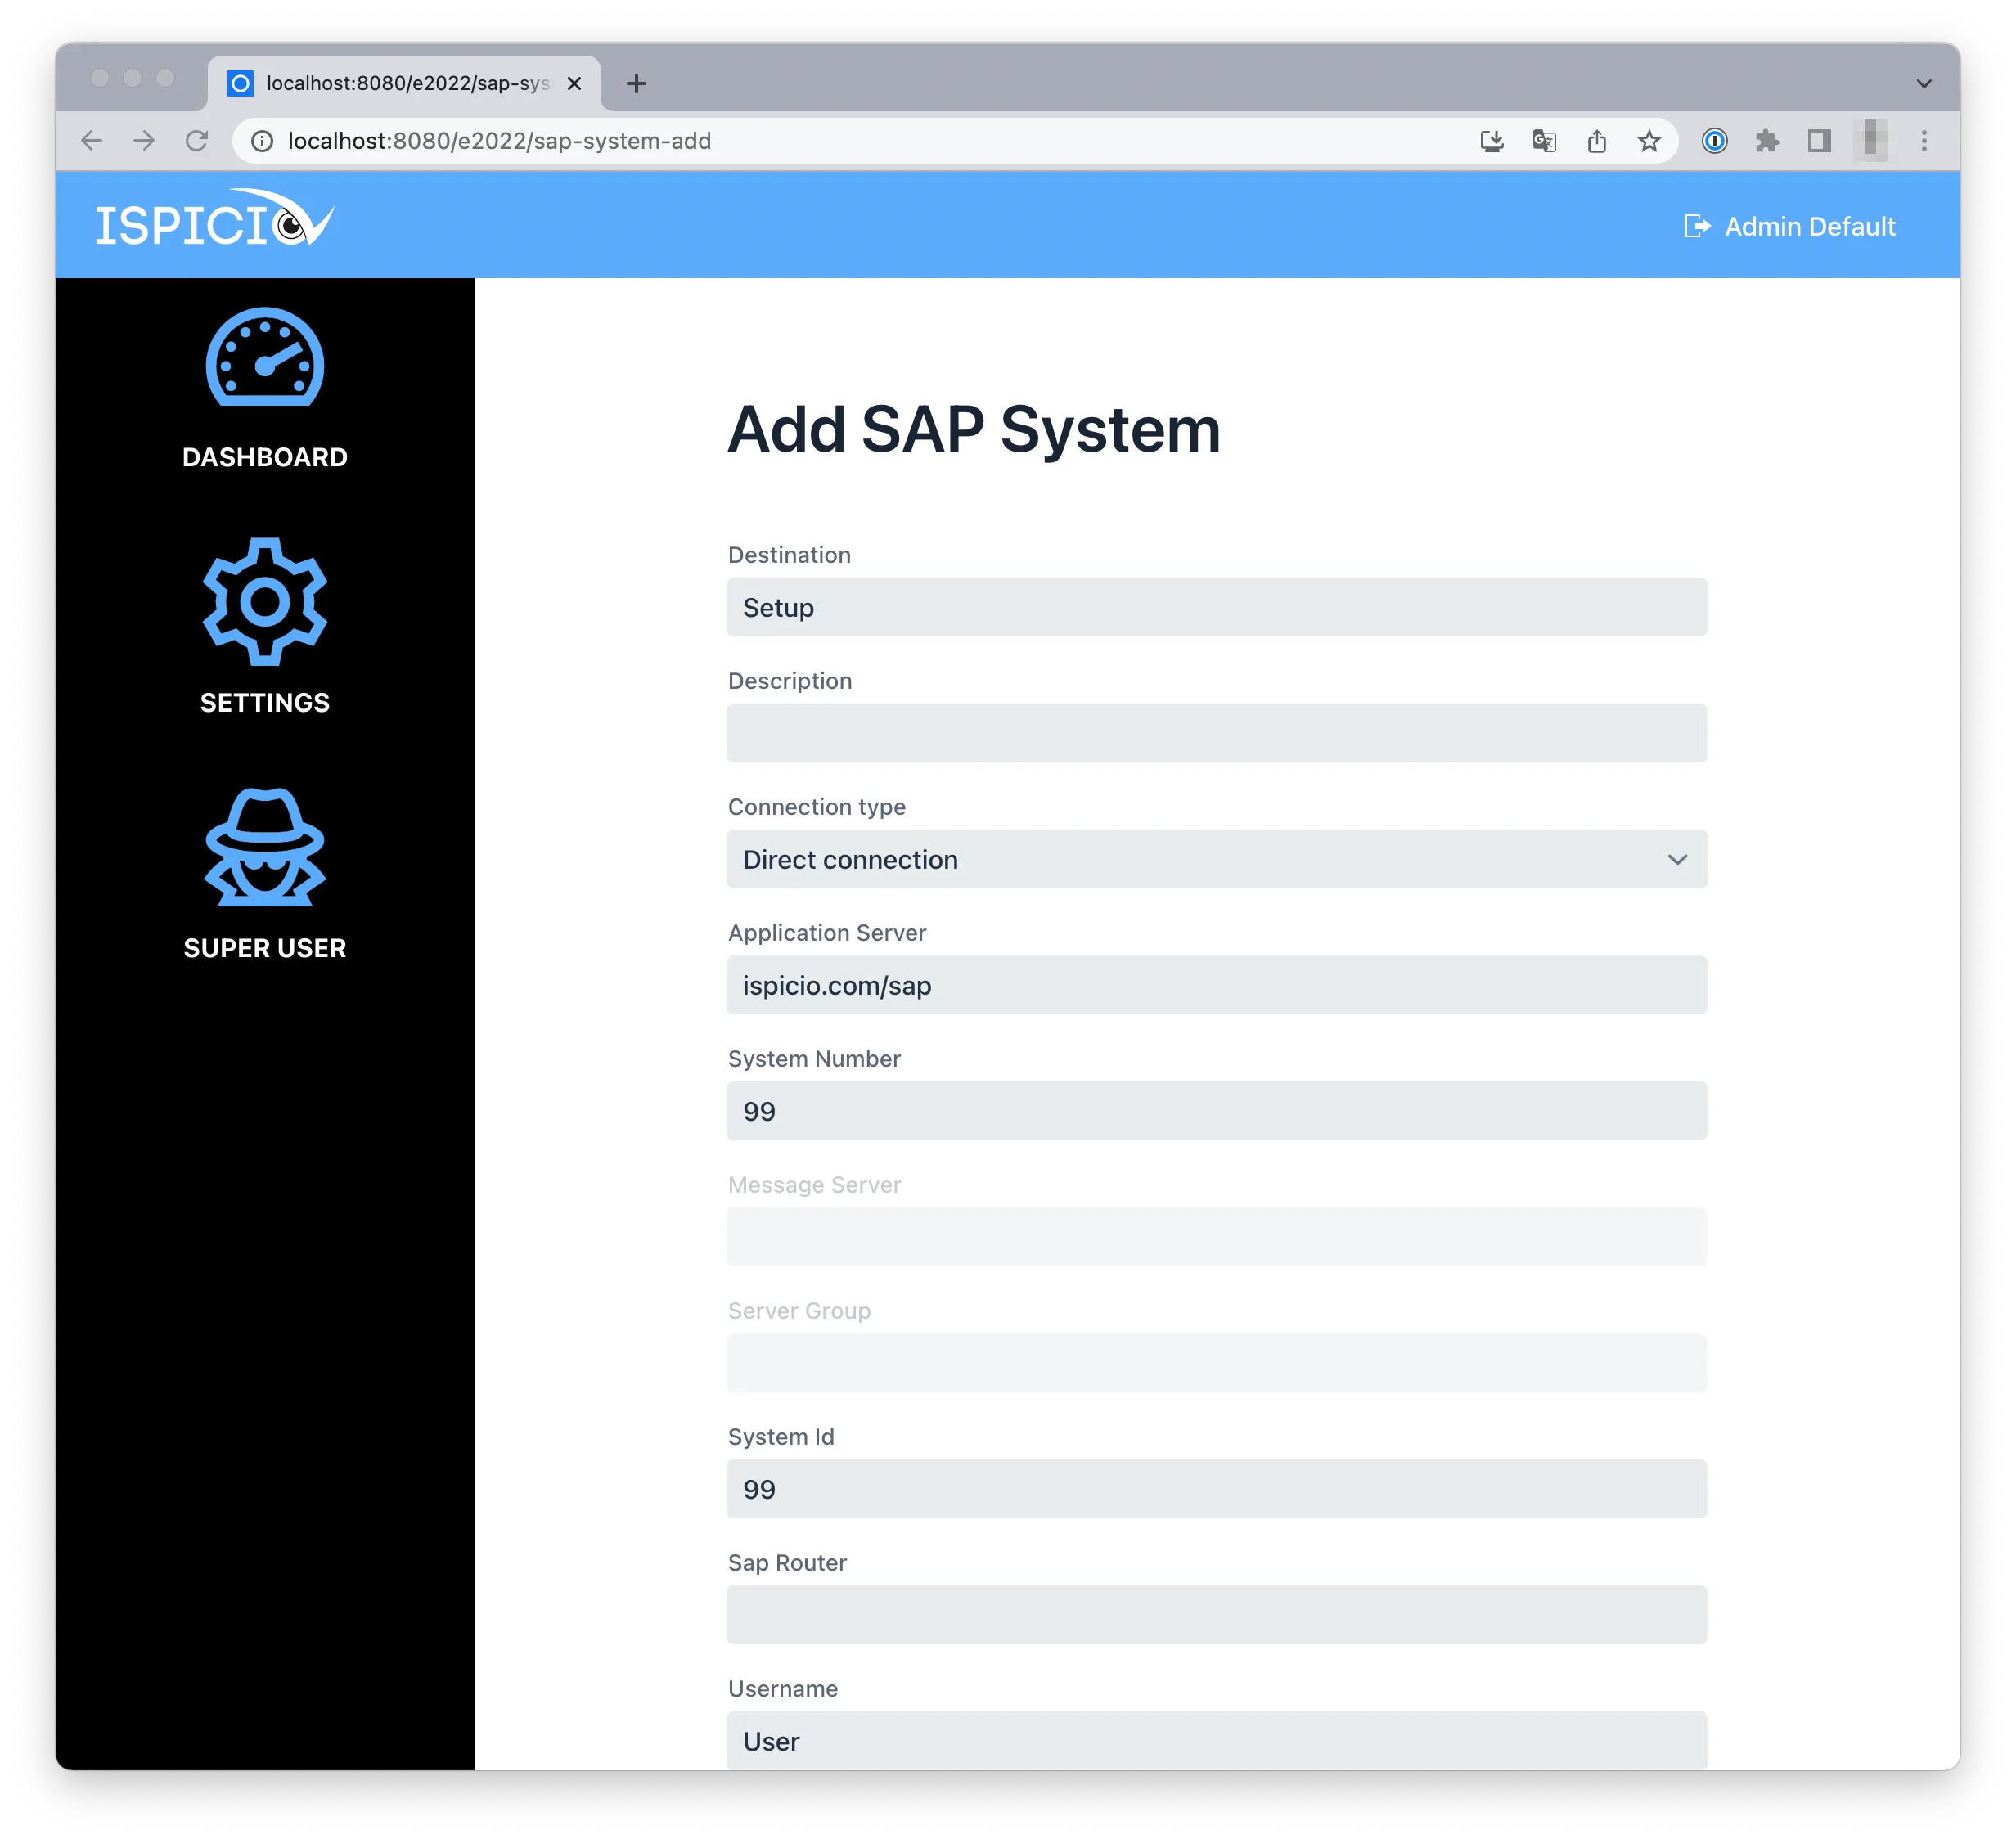
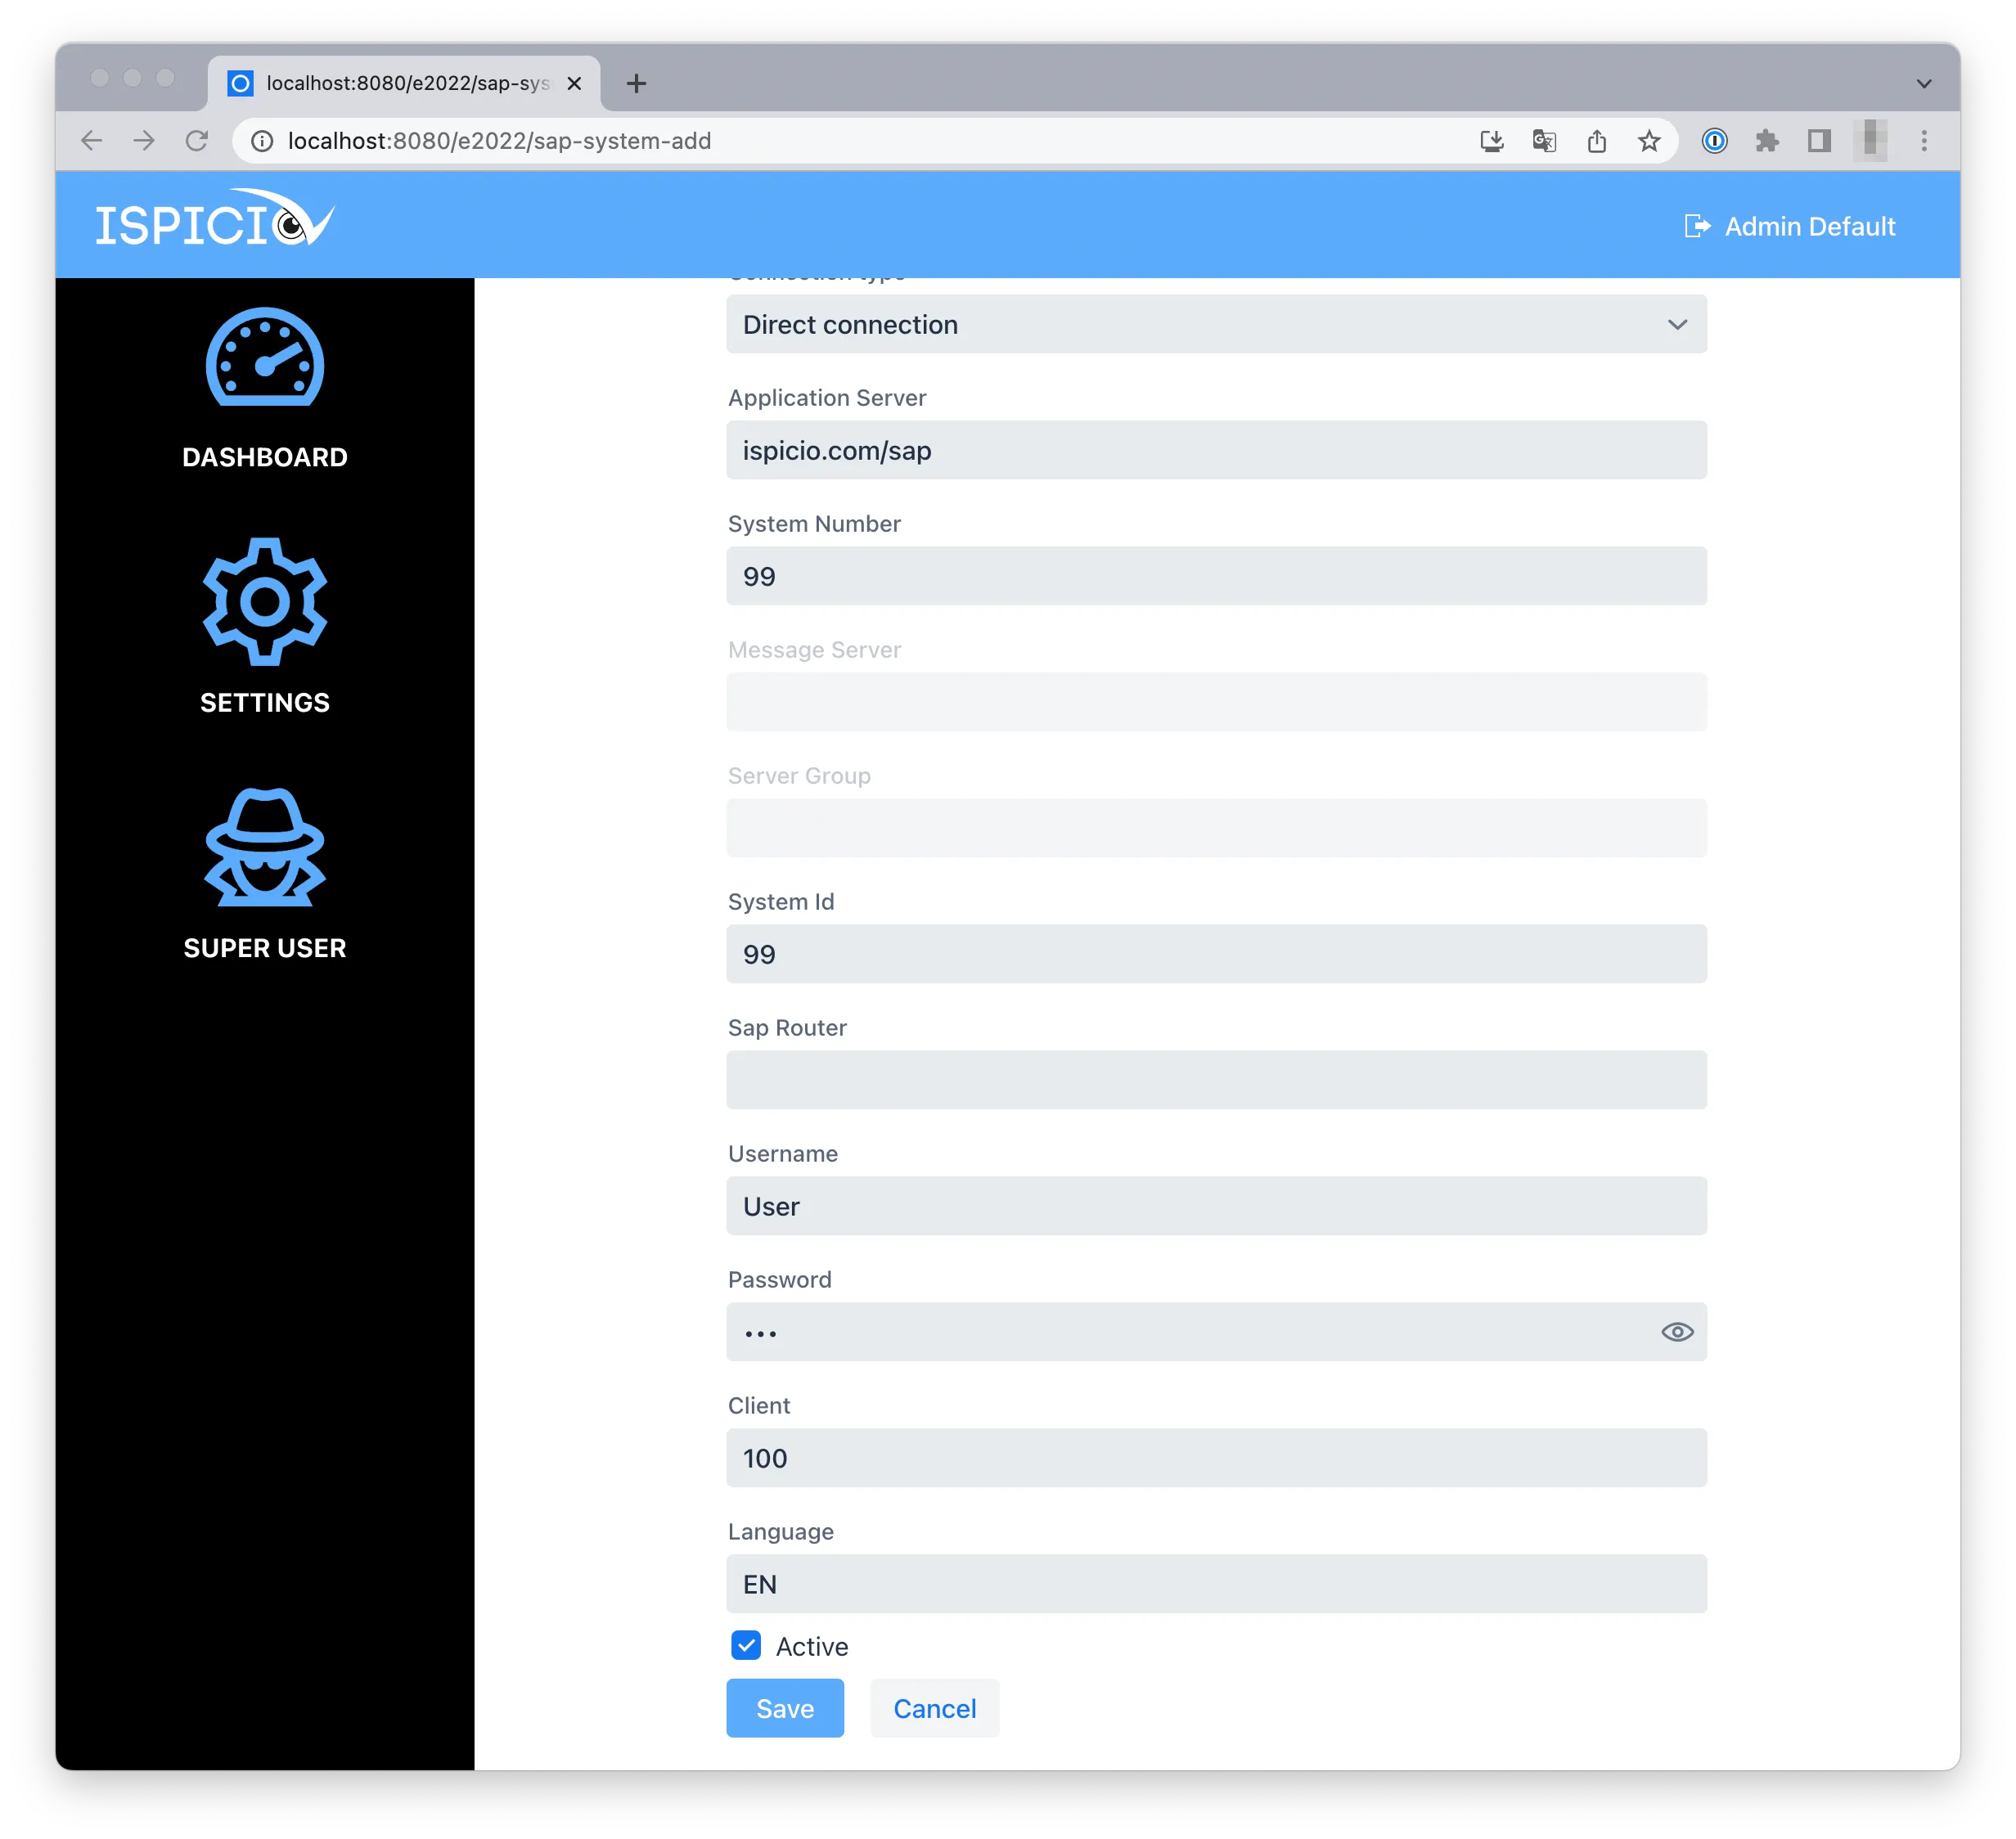
Enter the connection details in the Add SAP System form: Destination (the name under which users select the system), Description, Connection type, Application Server, System Number, System Id, Sap Router, Username, Password, Client and Language. Under Username and Password, enter the interface user you prepared in SAP. With the connection type Direct connection, the fields Message Server and Server Group are grayed out.
-
Select the Active check box and click Save.
-
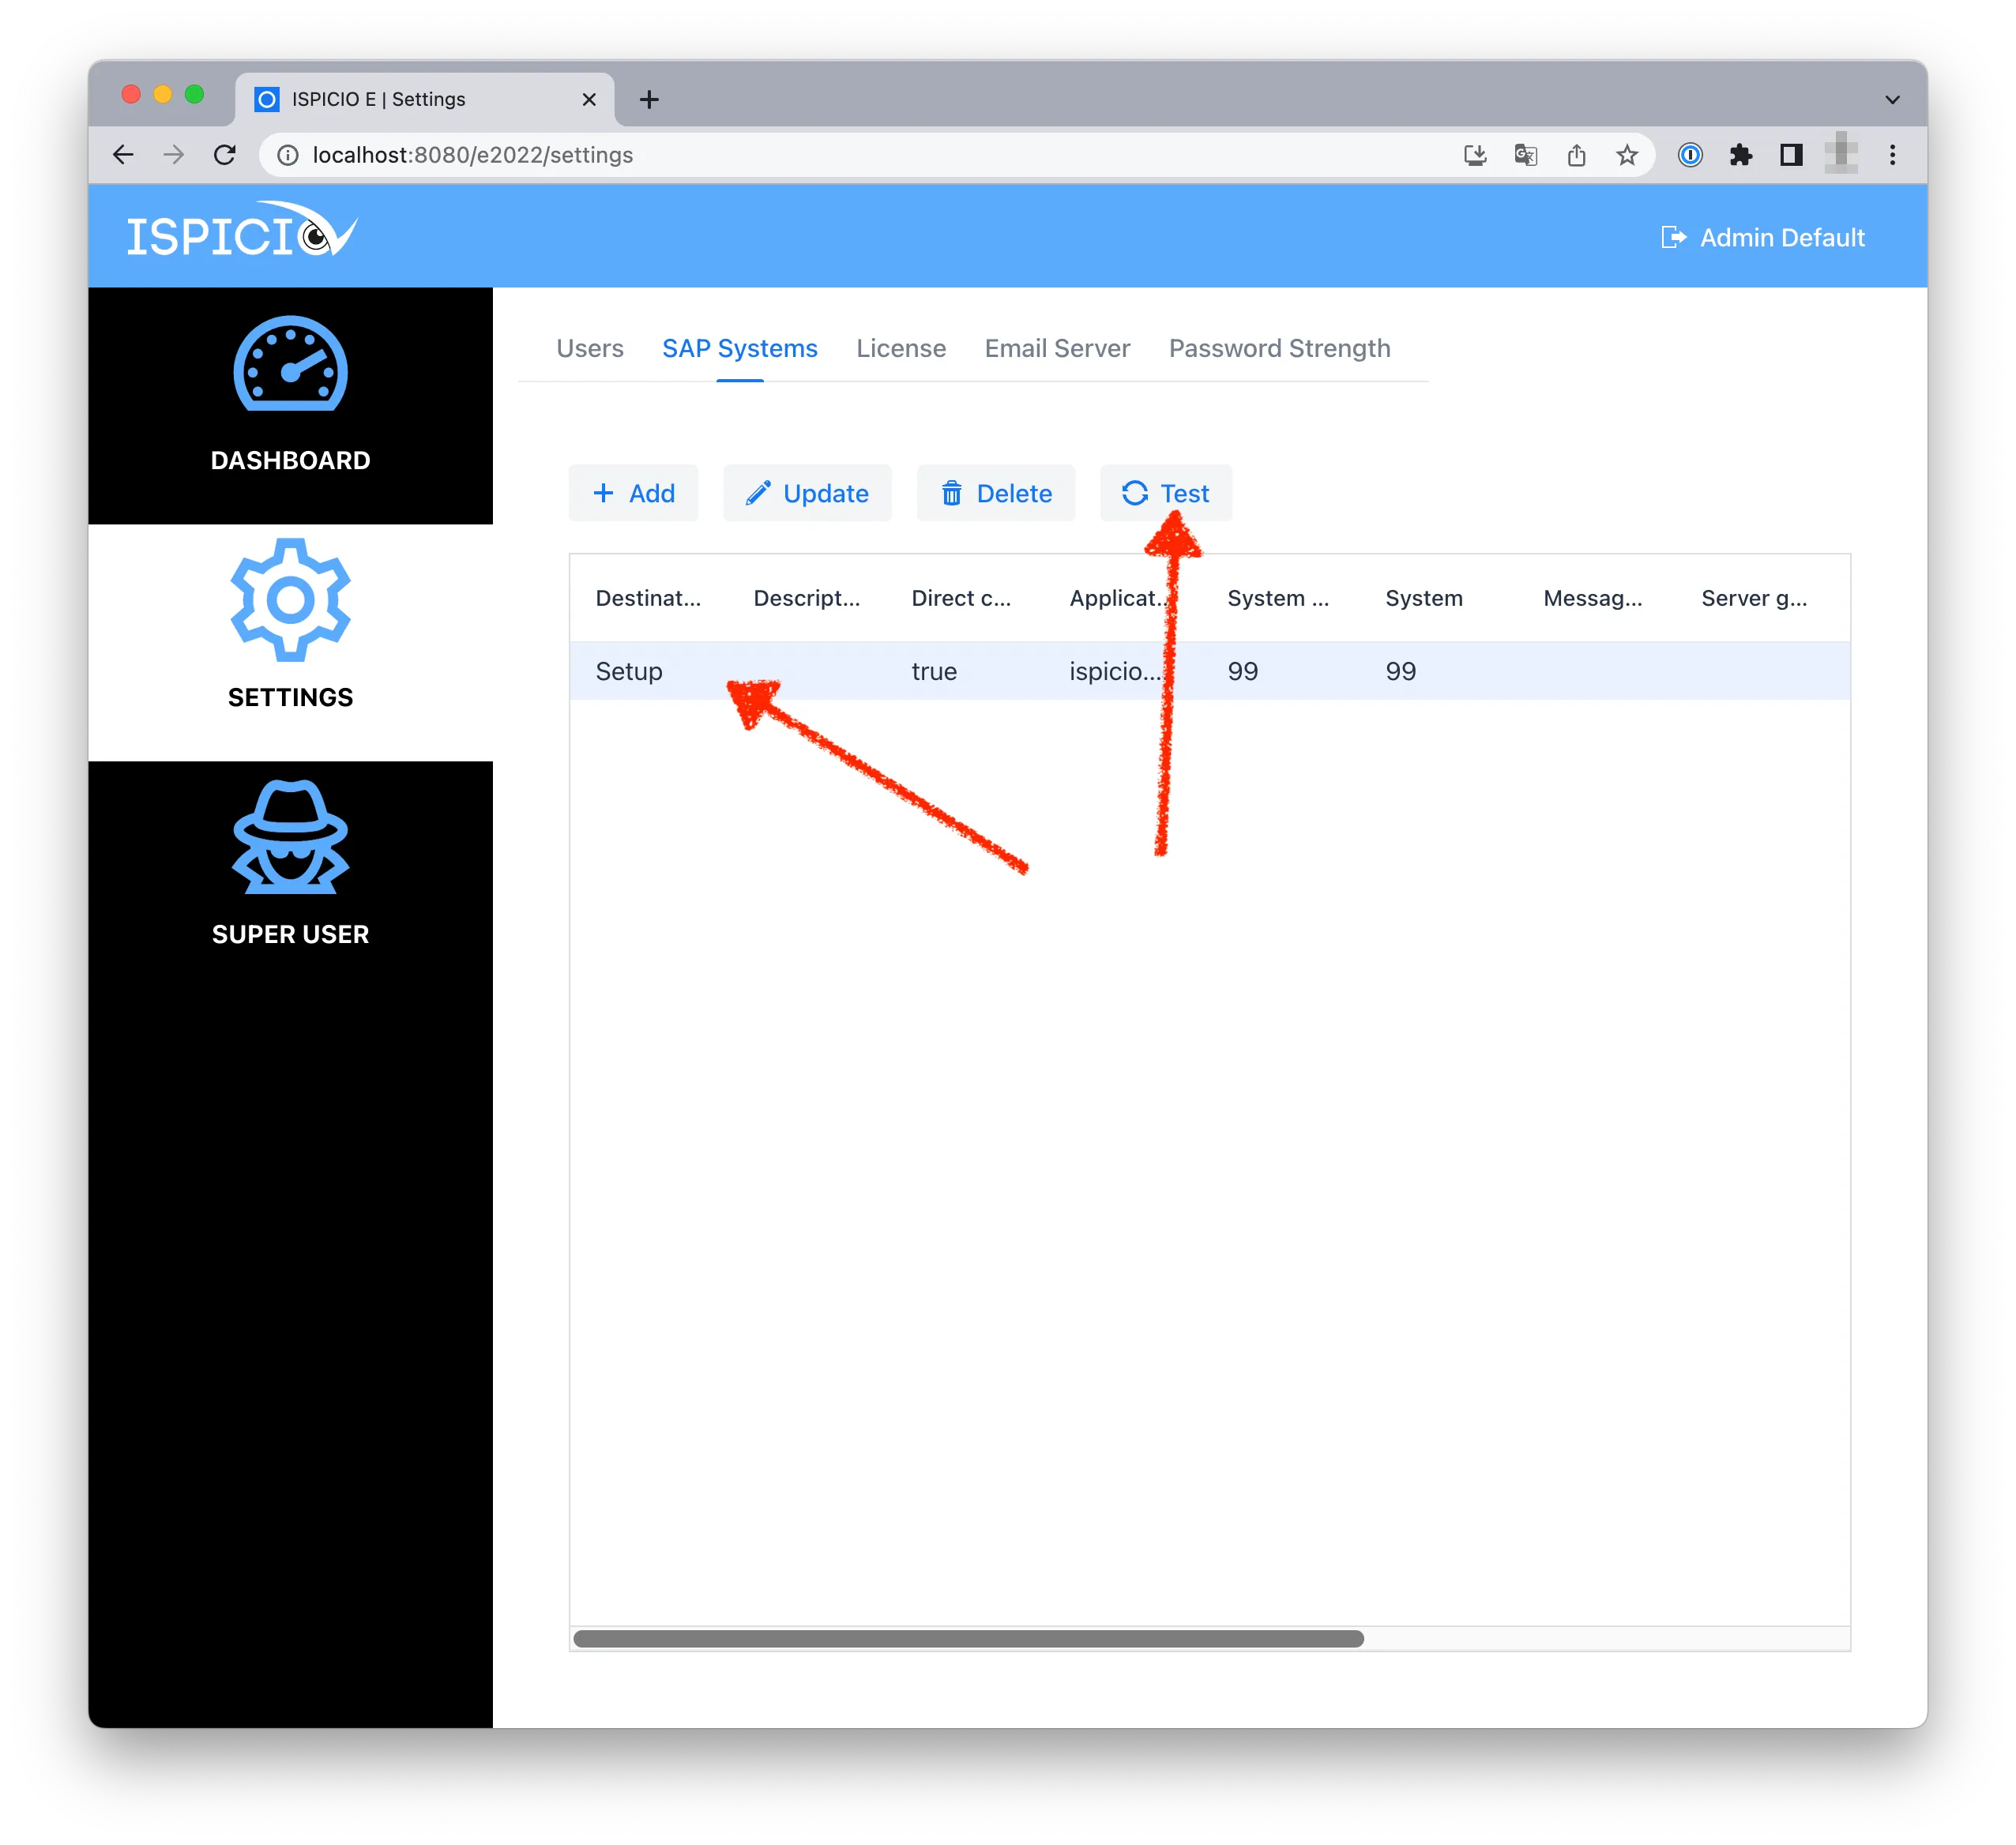
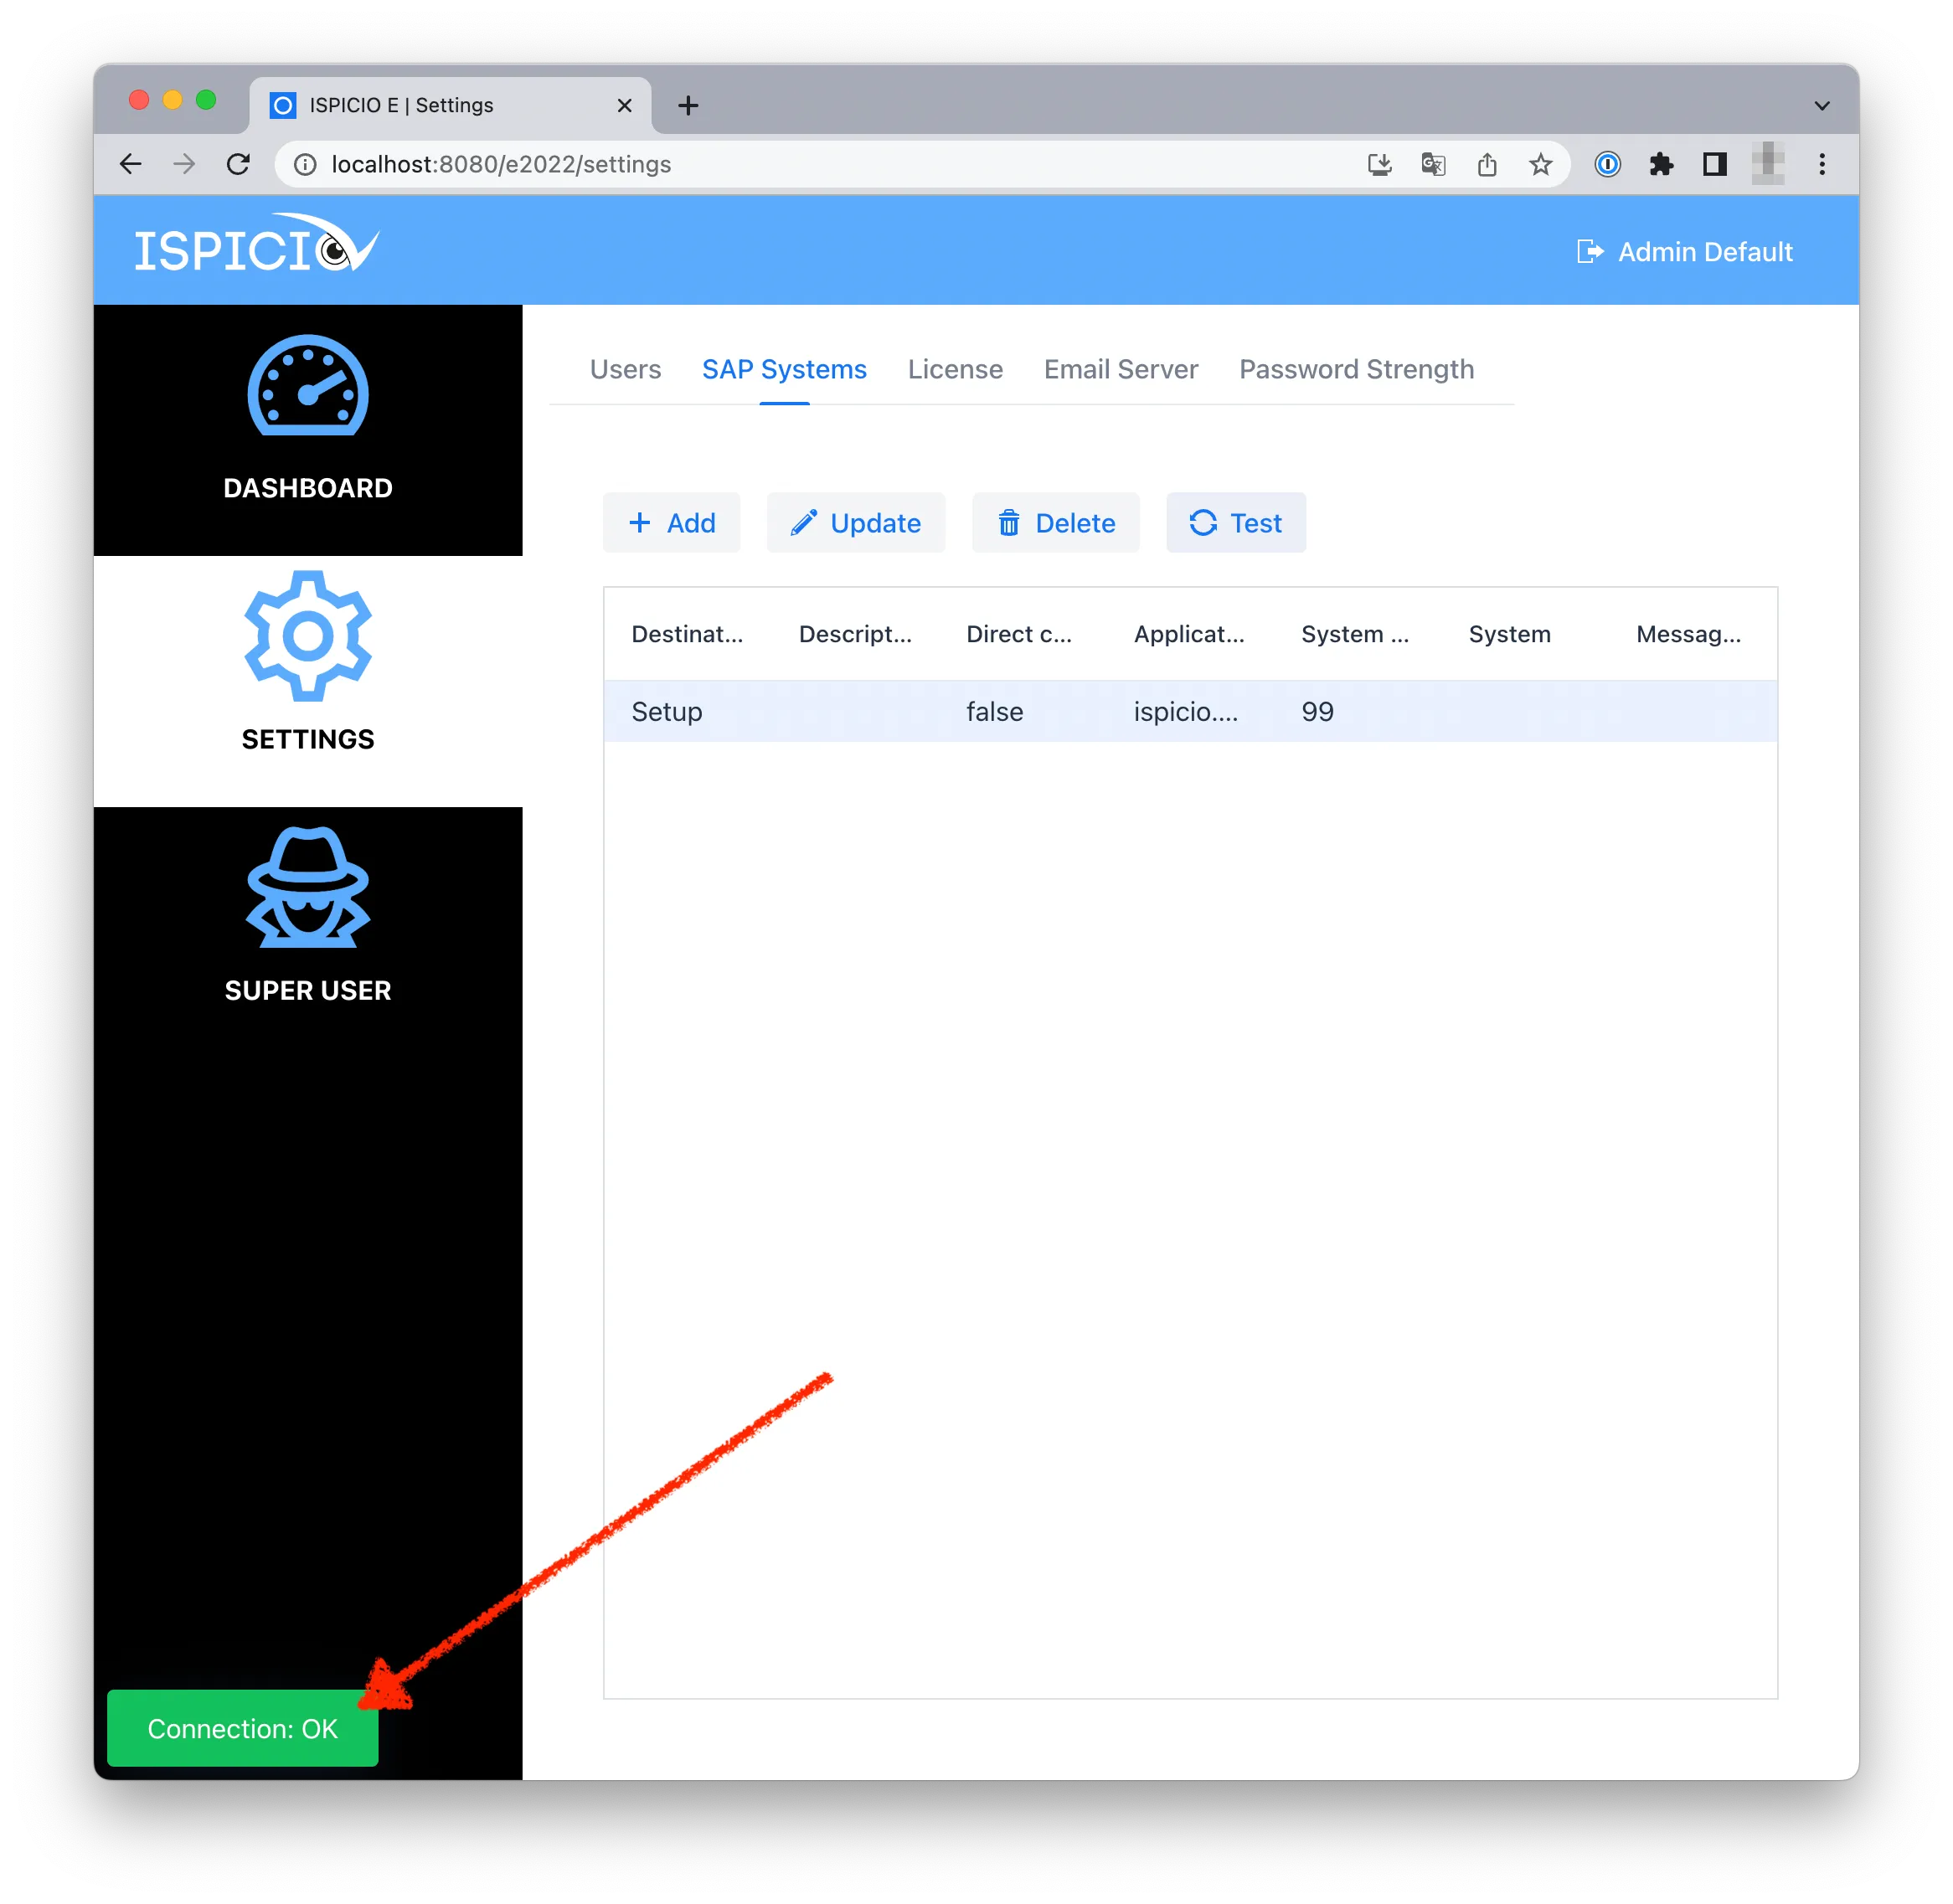
Select the entry in the list and click Test.
-
If the connection was established, the message Connection: OK appears at the bottom left.
Create a user
-
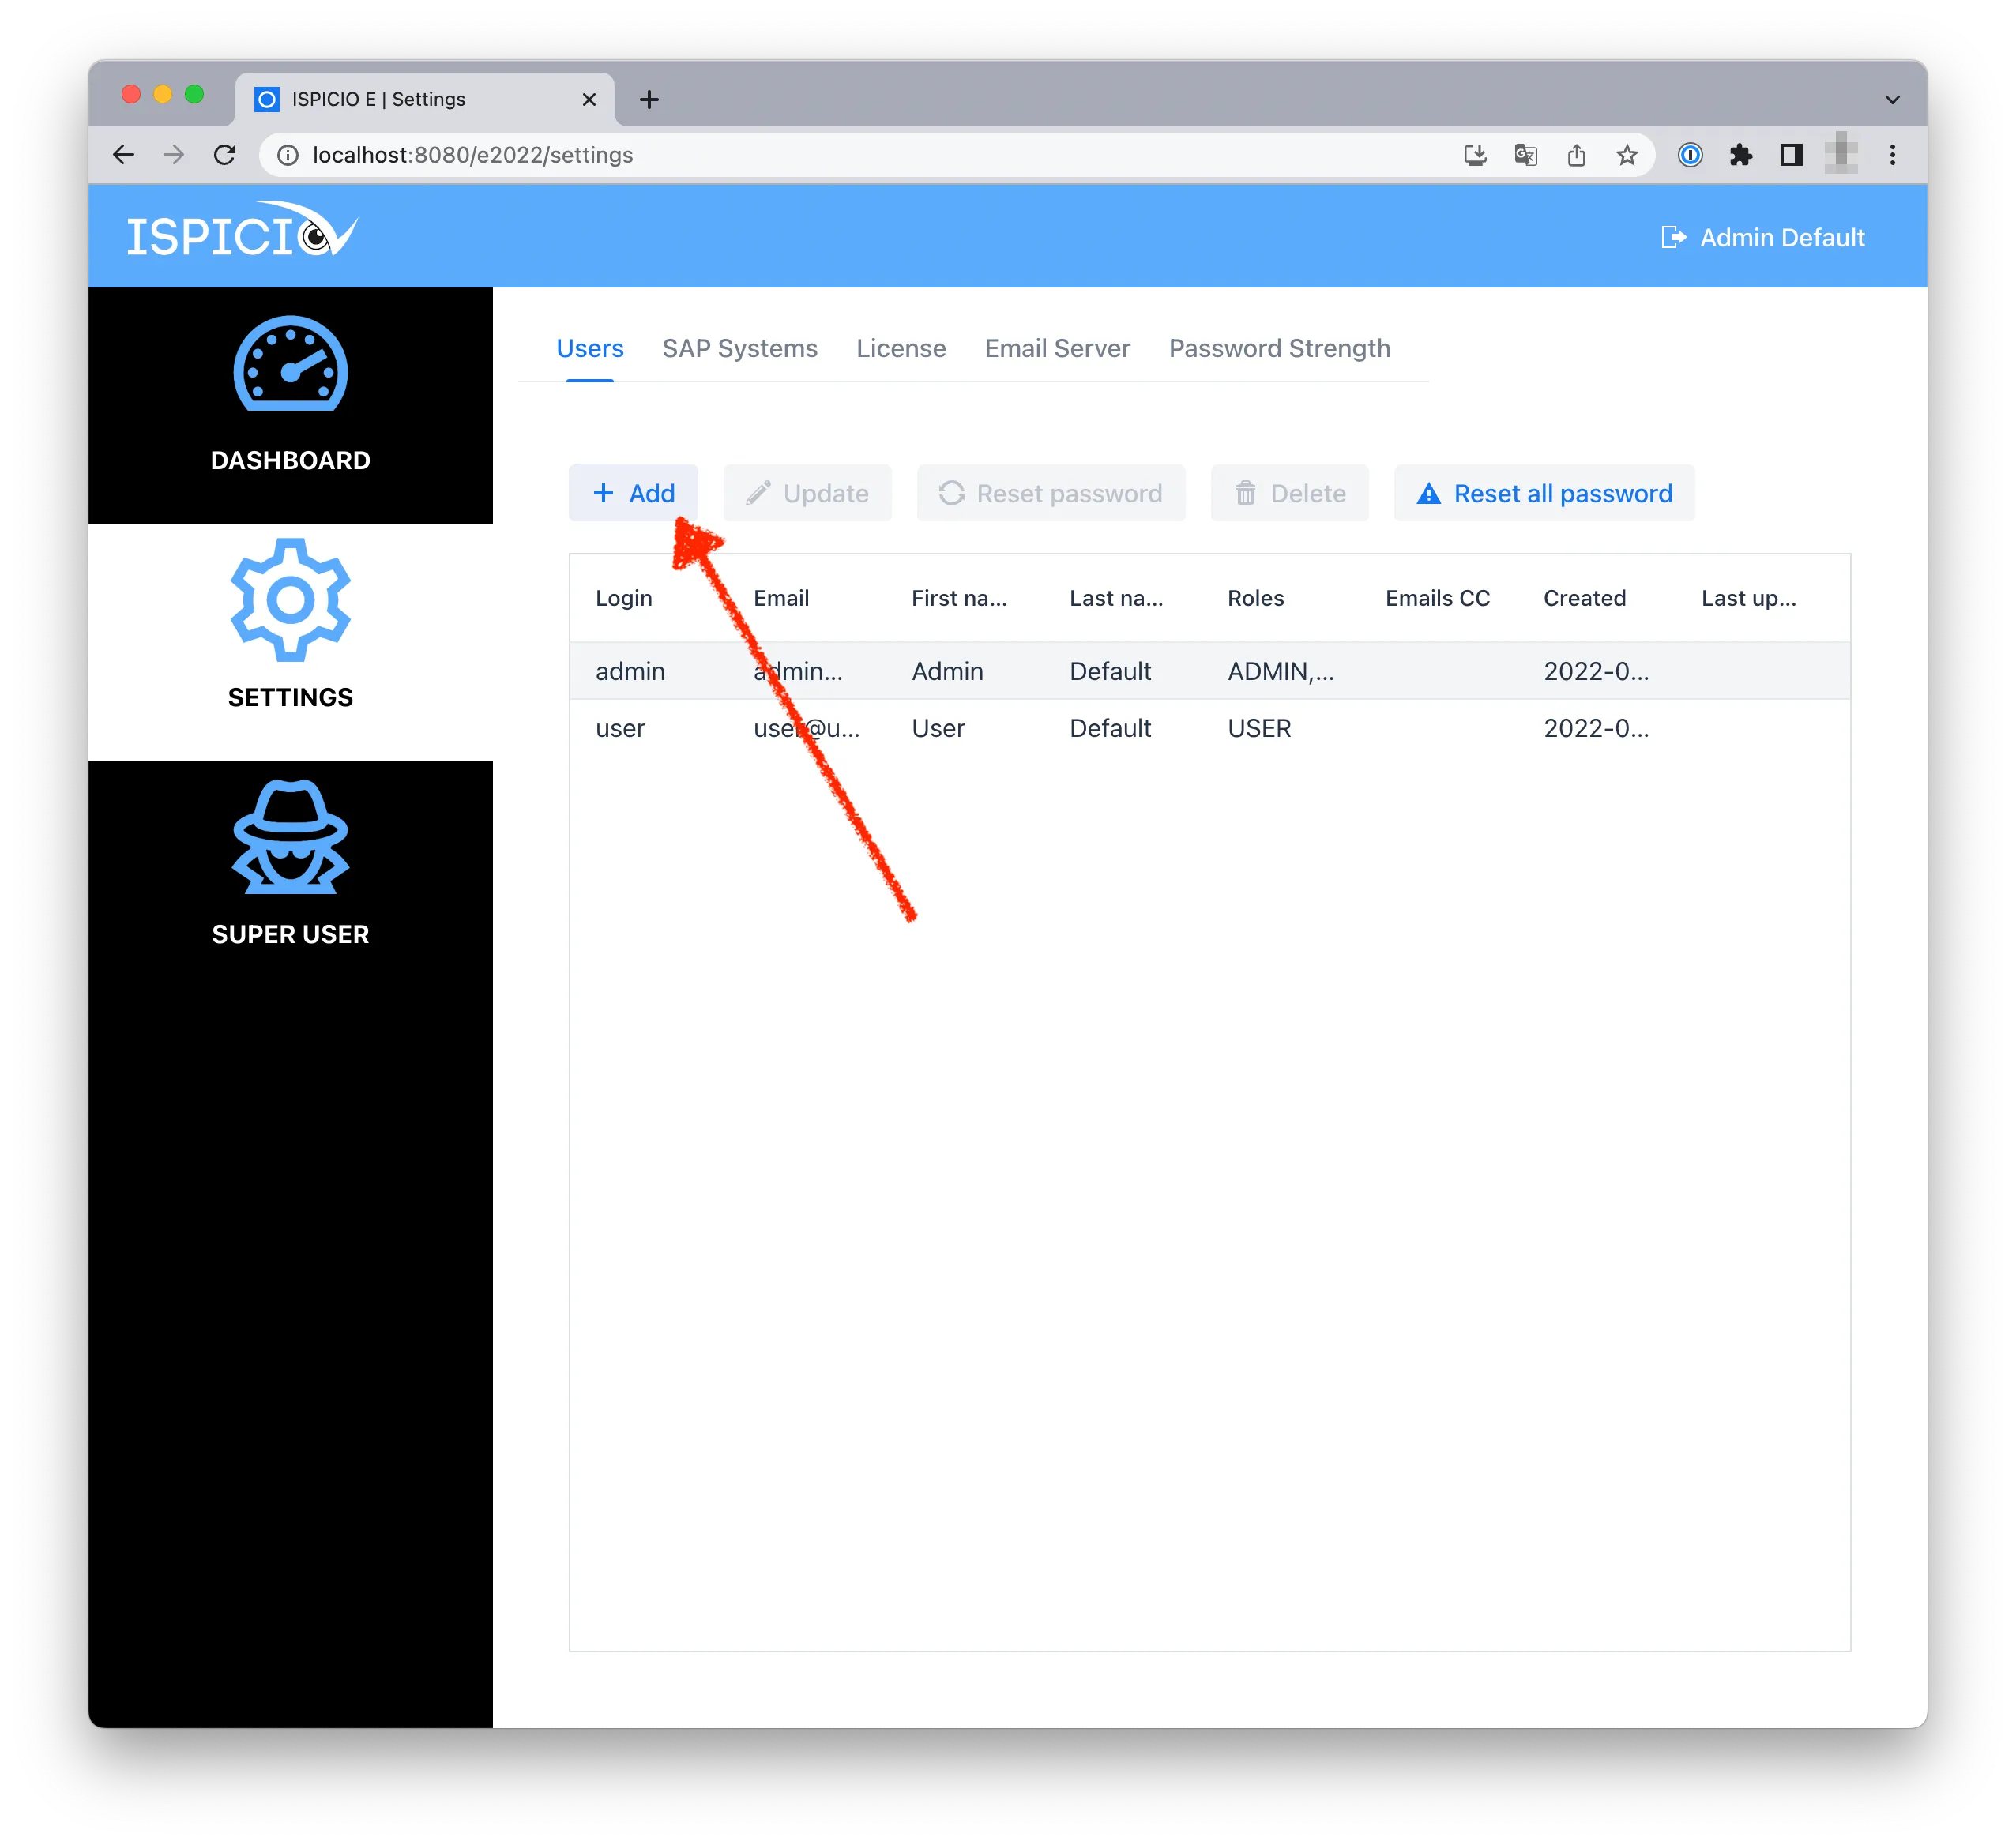
Open the Users tab and click Add.
-
Enter the details in the Add user form: Login Name, First Name, Last Name, Email and, if required, Emails CC (further addresses, separated by commas).
-
Select the Active check box to enable the account.
-
Under Roles, select the role or roles:
Role in the user interface Role Authorization ADMIN Admin Can change all settings. REVIEWER Reviewer Approves or rejects emergency user sessions after the fact. USER User Can request emergency users and carry out sessions. 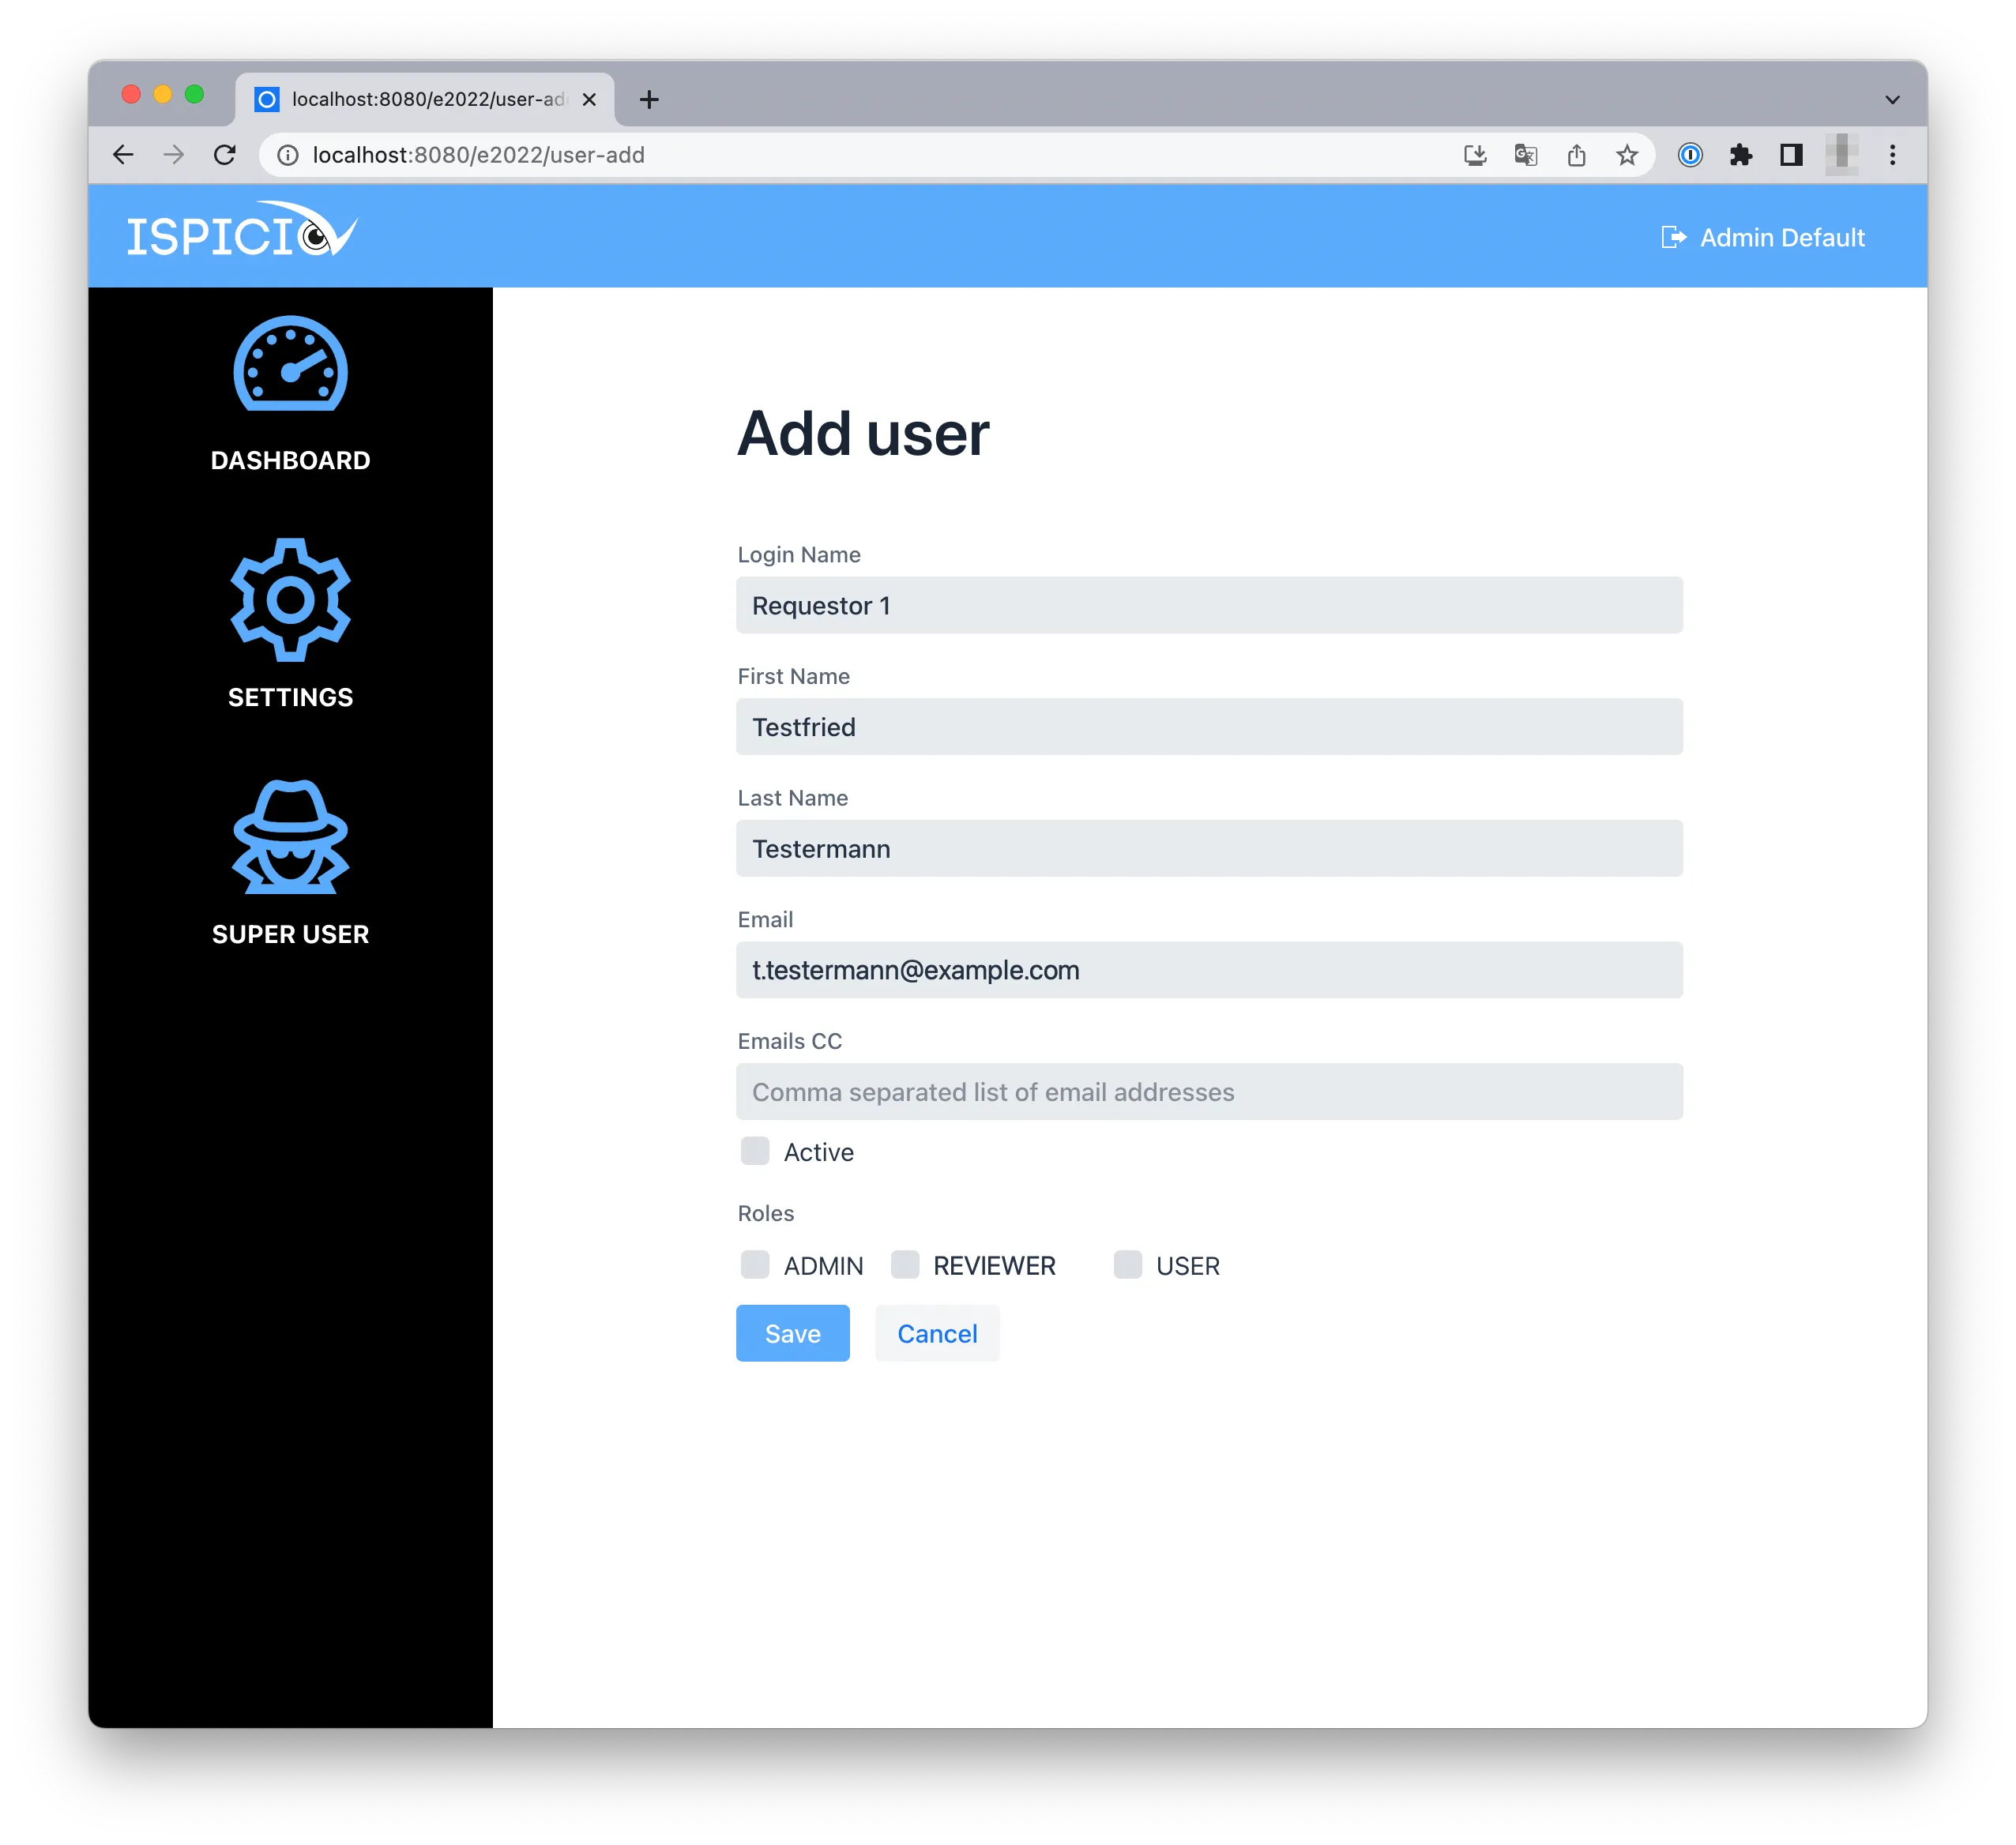
-
Click Save. The user receives the password by email.
Manage users
The Users tab has further buttons above the list of users. For Update, Reset password and Delete, first select the user in the list.
| Button | Meaning |
|---|---|
| Update | Changes the details of the user, for example the name or the email address. This is also where you deactivate a user: clear the Active check box. |
| Reset password | Changes the password of the user. After the click, ISPICIO_E automatically sets a new password that meets the password rules and sends it to the user by email. |
| Delete | Deletes the user. Use this button only in exceptional cases: earlier sessions of the user can no longer be traced afterwards. It is better to deactivate the user. |
| Reset all password | Changes the passwords of all users and sends them out. This is important when the password rules have changed. |